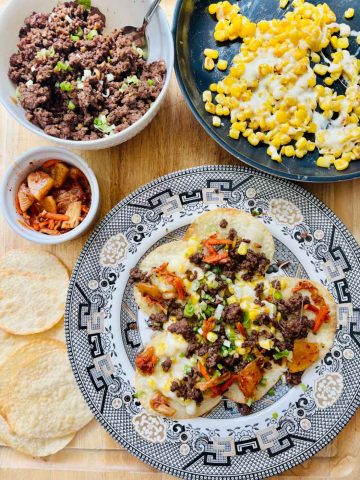
• Skip to primary navigation
  • Skip to main content
  • Skip to primary sidebar
  • Home
  • About

Betty Eatz

Homemade Blueberry Jam with Rum

August 24, 2022

Homemade Blueberry Jam with Rum

Overhead view of homemade blueberry jam in mason jar and saucepan scraped clean

It's Quick Pickling and Preserving Week on Betty Eatz and today we are making homemade blueberry jam with rum. Making jam from scratch might sound daunting, but I assure you it is not. It is easy to put together and done in less than 30 minutes.

First, let's talk about toast.

Delivery truck painted as a toaster with toast coming out the top. A virtual toastermobile!

Maillard Reaction

How is it that toast is so wonderful? I may not be hungry, but the moment I smell toast being made by someone in my house I want some, too. It smells so good.

There is something cozy about the aroma of bread baking, and maybe that’s what makes toast such a comforting smell. Thanks to the browning caused by radiant heat from an oven, toaster, or even campfire, slices of bread become toast.

The process is called the Maillard reaction.

French chemist Louis Maillard first described the chemical reaction in 1912 after conducting experiments in protein synthesis. Scientists have since discovered that when the Maillard reaction takes place and all the lovely browning occurs, hundreds of different flavor compounds are created. These compounds produce even more flavors.

Maybe this is the answer to why toast is so wonderful. But perhaps it’s also the jam.

Jam ingredients: blueberry, sliced lemon, sugar, and Gosling's Black Seal Rum

Making Jam

I used to get together with some mom friends when my kids were younger. We would make jam while our kids played. Between the crates of berries, pectin, hot water baths, and tongs, it was quite a sticky production.

The resulting jars of jam were spread between peanut butter sandwiches and plopped on yogurt. My favorite way to eat it? On toast.

Years later, I’m still making jam. It’s still delicious. But now, I don’t use pectin.

Bubbling homemade blueberry jam on the stovetop with berries being mashed with a masher

Pectin

Pectin is a starch that is found naturally in some fruits. Powdered pectin is added to jams, jellies, marmalades, and preserves during the cooking process to quickly thicken and produce a gel-like texture. Contrary to popular belief, it doesn’t add longevity to the shelf life.

You don’t have to use pectin to get your jams to gel, however. Pectin alternatives include agar agar, chia seeds, cornstarch, gelatin, and tapioca starch. Also, citrus!

This recipe uses lemon juice to help set the jam.

Spoon of finished jam

Lessons Learned

  • If you don’t want rum in your jam, leave it out. The jam will still be delicious.
  • Want a more pronounced rum taste? Cook the jam and then stir in the rum at the last moment. If you add more than a tablespoon the jam will be loose and runny.
  • Don’t despair if you don’t have a candy thermometer. You can eyeball the jam to see when it has thickened enough. It will continue to thicken as it cools down.

Hat Tips

Many thanks to Jamie at Scattered Thoughts of a Crafty Mom for the blueberry jam inspiration and to Benjamin Lehman on Unsplash for the toastermobile photo.

Jam topped toast with a bite taken out of it. Next to it is the jar and a spoon.
Print
clock clock iconcutlery cutlery iconflag flag iconfolder folder iconinstagram instagram iconpinterest pinterest iconfacebook facebook iconprint print iconsquares squares iconheart heart iconheart solid heart solid icon
Overhead view of jam in mason jar and saucepan scraped clean

Homemade Blueberry Jam with Rum

5 Stars 4 Stars 3 Stars 2 Stars 1 Star No reviews
  • Author: Betty
  • Prep Time: 10 minutes
  • Cook Time: 10 minutes
  • Total Time: 20 minutes
  • Yield: 8 ounces 1x
Print Recipe

Ingredients

Units Scale
  • 2 cups fresh or frozen blueberries
  • ¾ cup granulated sugar
  • 1 Tbsp fresh lemon juice
  • 1 Tbsp rum


Instructions

  1. Place berries, sugar, lemon juice, and rum into a medium saucepan.
  2. Cook over medium-high heat and allow the mixture to come to a boil.
  3. Immediately reduce the heat to medium. Cook for 10 minutes. Smash some of the berries with a potato masher about halfway through the cooking time.
  4. The liquid in the saucepan should start to thicken. Test the mixture if desired with a thermometer to see if it has reached 220 degrees F/104 C.
  5. Ladle the jam into clean pint-sized mason jars and let cool. Then, seal jars and store them in the refrigerator. Eat within 2 weeks.

Did you make this recipe?

Please leave a comment below!

Share a photo of your creation by tagging us @betty_eatz

Escabeche

August 23, 2022

Escabeche

Carrots, cauliflower, celery, and bell peppers cut up and in a mason jar with spices and vinegar brine. Also called escabeche.

It’s Quick Pickling and Preserving Week here on Betty Eatz! We are going to do some easy and quick pickling and jamming of summer vegetables and fruits. And I promise it’s not hard.

Today’s project: escabeche. It’s a cool and zingy side dish to any grilled meat or fish, a bright and crunchy topping on burgers and tacos, and a beautiful addition to charcuterie boards.

Drawing from Spanish-influenced global cuisines, escabeche can be meat, fish, or vegetables cooked in vinegar and spices. I’m doing a variety of vegetables that will be plunged in a hot vinegar bath.

This is different from canning.

A view of my mother-in-law's very green backyard property in Oregon. Don't sit on the wooden bench because the seat is gone.

Canning

Do you know someone who cans? My mother-in-law is a canning queen. She has pickled and preserved food for 50-plus years, and I am in awe.

Every year she puts up green beans, tomatoes, and veggies of all kinds that are grown on her Oregon property. Jams and preserves are also made from locally grown fruit and rhubarb from her garden. She has even tinned freshly caught fish!

To properly can something, there are a number of essential steps that must be done to ensure food safety and longevity. Canning jars and lids are sterilized, filled with food, and sealed. Then, filled jars go through a period of hot water immersion to vacuum seal them before storing them.

Food prepared this way lasts for a year or more if stored correctly. In years past, this was the only way anyone was going to have out-of-season tomatoes or peaches in the middle of winter. It was also a way to not let any fresh produce go to waste.

What I’m doing this week is pretty amateur, I’ll admit. No hot water baths here. But! The results are delicious and fun is had along the way.

Head of cauliflower, stalks of celery, whole mini bell peppers, baby carrots arranged artfully on a wooden cutting board

Quick Pickling Escabeche

You don’t have to go through the canning process to quick pickle vegetables. All it requires is a squeaky clean jar, fresh veggies, and a piping hot vinegar-water combo. Plus, some spices, if you want.

Good candidates for quick pickling: bell peppers, carrots, celery, cucumbers, fennel, green beans, onions, radishes, and zucchini. Starchier vegetables like cauliflower and broccoli should be blanched for a few minutes before being added to the mason jar.

If you add red onions or beets they will eventually make everything pink once the pickling occurs. Everything. That’s not necessarily a bad thing, but be aware.

Next, you will prepare a vinegar and water mixture and heat it to boiling. This is what you will pour over the veggies to quickly pickle them.

Cinnamon sticks, star anise, bay leaves, whole black peppercorn, coriander seeds, cumin seeds, a small mound of kosher salt, and some demerara sugar spread on a wooden board

Homemade Pickling Spice

Here is where you can custom mix the spices you want in your quick pickling project. Some popular options include bay leaves, celery seeds, cinnamon sticks, coriander seeds, cumin seeds, fennel, star anise, whole black peppercorn, and whole cloves. Plus kosher salt and sugar.

Play around with the spice combination to find what you like. You can quick pickle on the spur of the moment by keeping a big batch of spice mix on hand that you have pre-mixed. You will need about 1 tablespoon of mixed spices per 2 cups of liquid.

For This Escabeche, Quick Means Quick

So, how fast is escabeche ready to eat? In 24 hours. Yes, it is ready to eat the next day.

Always keep quick pickled items in the refrigerator. Because it does not include any preservatives, escabeche needs to be eaten within 2 weeks.

Drone view of veggie mason jar ready to become escabeche

Lessons Learned

  • I like to fill clean jars with boiling water and let them stand for 10 minutes to ensure they are squeaky clean. Don't forget to place the lids and rings in a bowl and cover them with boiling water, too.
  • White vinegar will give the cleanest looking results, but you can use any vinegar you'd like. I used a 50-50 combo of apple cider vinegar and white vinegar for this recipe.
  • Use common sense. Check for mold in any jarred item before eating. Just like other disappointments in life, things sometimes go bad and should be thrown away.

Hat Tips

Many thanks to Seizan Dreux Ellis of Cafe Gratitude for his escabeche recipe and to Sue from The View From Great Island for her comprehensive quick pickling guide!

Side view of escabeche in a mason jar with hot vinegar brine being poured into it
Print
clock clock iconcutlery cutlery iconflag flag iconfolder folder iconinstagram instagram iconpinterest pinterest iconfacebook facebook iconprint print iconsquares squares iconheart heart iconheart solid heart solid icon
Carrots, cauliflower, celery, and bell peppers cut up and in a mason jar with spices and vinegar brine

Escabeche

5 Stars 4 Stars 3 Stars 2 Stars 1 Star No reviews
  • Author: Betty
  • Prep Time: 35 minutes
  • Cook Time: 5 minutes
  • Total Time: 40 minutes
  • Yield: 8 cups 1x
Print Recipe

Ingredients

Scale

6 to 8 cups of mixed vegetables cut into bite-sized pieces (cauliflower, carrots, celery, mini bell peppers, baby carrots)

1 jalapeno, cut in half

1 tsp olive oil

4 or 5 dried bay leaves

2 cinnamon sticks

1 tsp coriander seeds

1 tsp cumin seeds

2 star anise

1 tsp whole black peppercorns

1 garlic clove, cut in half

2 cups apple cider vinegar

2 cups white vinegar

2 cups water

3 tsp kosher salt

3 tsp raw or Demerara sugar


Instructions

  1. Divide and place the cut-up veggies and jalapeno halves in clean quart-size mason jars. If you are using cauliflower or broccoli, blanch them first in boiling salted water for 2 minutes and drain before adding to mason jars.
  2. Heat the oil in a medium saucepan. Add the bay leaves, cinnamon sticks, coriander seeds, cumin seeds, star anise, peppercorns, and garlic clove halves. Saute for 2 to 3 minutes or just until fragrant.
  3. Tip in the apple cider vinegar, white vinegar, and water. Bring the spice vinegar mixture to a boil, then add the salt and sugar. Stir to dissolve.
  4. Pour the hot liquid into the prepared jars. Use a slotted spoon to distribute the spices evenly between the jars. Ensure that the vegetables are completely submerged in the vinegar mixture, adding more liquid if necessary.
  5. Cover tightly with lids and screw top rings. Allow jars to cool slightly before storing them in the refrigerator. 
  6. Escabeche is ready to eat the next day. Keep stored in the fridge and eat within 2 weeks.   

Did you make this recipe?

Please leave a comment below!

Share a photo of your creation by tagging us @betty_eatz

Grilled Zucchini and Corn Salad

August 22, 2022

Grilled Zucchini and Corn Salad

Black plate piled with spinach, grilled zucchini, grilled corn, and halved grape tomatoes arranged by color.

The barbecue is one of the best ways to cook zucchini! Incorporating charred veggies with fresh ones makes Grilled Zucchini and Corn Salad into a delicious main or side salad. Add a sumac dressing for some brightness and acid.

Spoonful of ground sumac

Sumac

What is ground sumac? It is a dark red spice that is widely used in Middle Eastern cuisine. The flavor manages to be deliciously tart and lemony, but also kind of sweet.

This versatile spice can be used on seafood, meats, and vegetables like you would use lemon juice. It also adds tartness to marinades and salad dressings without adding any extra liquid. Sumac plays well with other spices and is an ingredient in spice blends like za’atar.

One of my favorite ways to use it is in salad dressings. Combined with oil, lemon juice, and a few other goodies, sumac brings an earthy, tangy twist to vinaigrettes. It’s especially good with grilled items.

Two ears of corn, two zucchini, and a mess of itty bitty grape tomatoes in red, yellow, and orange

Grilled Zucchini

Zucchini was made for the grill. Seriously. Cut the ends off, split them lengthwise, and oil the cut sides. That’s it.

How long do you leave it on? It depends. If you like it very tender and almost melty, you can grill it for 15 to 20 minutes.

I recommend you grill it for no more than 10 minutes if you are using it for salads like this one. The zucchini will be tender and have nice char marks but will hold together when cut into smaller pieces.

Zucchini halved and grilled

Grilled Corn on the Cob

If you have never tried grilling an ear of corn, I highly suggest you do it soon. The heat adds a subtle smokiness to fresh sweet corn. The yellow kernels make a pretty addition to any salad or side dish.

There is the option of grilling corn with the husks still on if you prefer. The kernels will steam rather than barbecue, but you might like that. You’re an adult, so you can do what you want.

Grape Tomatoes

Fresh and bite-sized, these tomatoes are favorites in a salad. Red ones are the most common. But I like that my local grocery store carries them in a variety of colors: red, orange, yellow, and green.

These pretty little jewels add some juicy freshness as a counterpoint to the grilled veggies. Plus, a pop of color!

Ingredients for sumac dressing: lemon, garlic, salt, and sumac laid out on a wooden board

Lessons Learned

  • Want to grill the tomatoes too? I say go for it. There is still fresh (spinach or leafy green) as a contrast to the cooked.
  • You can make this salad a few hours ahead of when you are going to eat it. Add the dressing and fresh herbs at the last minute so things don't get soggy.
  • Don't like or have ground sumac? I'm sad for you. But you can use any tart or zingy dressing you have. It's still a great salad!

Hat Tips

Many thanks go to Alida at Simply Delicious for her corn and grilled zucchini salad inspiration and to Manu at Manu's Menu for the sumac dressing recipe!

Close up of this delicious salad with dressing on it
Print
clock clock iconcutlery cutlery iconflag flag iconfolder folder iconinstagram instagram iconpinterest pinterest iconfacebook facebook iconprint print iconsquares squares iconheart heart iconheart solid heart solid icon
Black plate piled with spinach, grilled zucchini, grilled corn, and halved grape tomatoes arranged by color.

Grilled Zucchini and Corn Salad

5 Stars 4 Stars 3 Stars 2 Stars 1 Star No reviews
  • Author: Betty
  • Prep Time: 15 minutes
  • Cook Time: 10 minutes
  • Total Time: 25 minutes
Print Recipe

Ingredients

Units Scale

Salad

  • 2 zucchini
  • 2 ears of corn
  • 1 cup mixed grape tomatoes
  • 4 cups spinach
  • Italian Parsley
  • Fresh Mint

Sumac Dressing

  • 1 clove garlic, minced
  • 1 tsp salt
  • 2 tsp sumac
  • 1 tsp paprika
  • 4 Tbsp extra virgin olive oil
  • 2 Tbsp lemon juice


Instructions

  1. Preheat the outdoor grill to high. Trim ends from zucchini and slice lengthwise in half. Lightly oil zucchini and corn with nonstick spray oil or olive oil.
  2. Place the zucchini (cut sides down) and the corn on the grill when the grill is hot. Cook for 10 minutes, turning once halfway through. You want the zucchini to be tender but still holding its shape. Remove from the heat.
  3. Cut the tomatoes in half. Arrange the spinach on a platter and add the cut tomatoes on top.
  4. Slice the zucchini into smaller chunks and add to the platter. Cut the kernels off the ears of corn and pile them onto the platter.
  5. Combine the dressing ingredients into a lidded jar. Shake to combine well. Pour the dressing over the salad just before serving. Garnish with chopped parsley and mint.

Did you make this recipe?

Please leave a comment below!

Share a photo of your creation by tagging us @betty_eatz

Roasted Zucchini

August 15, 2022

Roasted Zucchini

Roasted zucchini with a deliciously crunchy panko topping

This roasted zucchini has crispy edges - no frying required!

Zucchini Season

Do you have a vegetable garden? Growing vegetables like zucchini in a home garden isn’t always easy. I fail every year.

Each spring, I get very ambitious and plant various vegetables and herbs in hopes of a bountiful summer harvest. Some things do well (rosemary, sage, oregano, and lavender), but others do not. Rest in peace, bell peppers, tomatoes, and jalapenos.

I wonder sometimes if the old World War II victory gardens were so named because the gardener was ecstatic that the plants survived.

World War 2 poster depicting an attractive woman in an American flag dress sowing seeds in a field

Victory Garden

During World Wars I and II, the U.S. National War Garden Commission encouraged the public to start home gardens to help offset consumer demand from food suppliers. Commercially grown crops were needed to help feed the service men and women who were fighting overseas.

Sometimes called war gardens or liberty gardens, these victory gardens were in backyards, public parks, and on apartment building rooftops. At one point, these gardens collectively yielded 40 percent of the fruits and vegetables consumed nationally!

That’s a lot of zucchini.

Five whole zucchini piled on a wooden cutting board

How to make Roasted Zucchini

Because it has high water content, zucchini can become squishy and watery when cooked. There are ways to help eliminate some of the moisture, such as salting, squeezing, and slicing very thinly.

Another solution: tornadoes.

Cross section of zucchini with the ends trimmed
First diagonal cut being made

Tornado Zucchini

This genius way of roasting zucchini involves slicing it diagonally in a continuous swirl. When done right, the result looks like a giant, green, veggie rotini. Or a tornado.

Because it has more cut surface areas exposed to heat, the zucchini offloads excess moisture while cooking. They are delicious plain, but are extra good with a crunchy topping made from panko, herbs, and spices.

Three veggies skewered and cut diagonally into twirly tornadoes

Lessons Learned

  • Most zucchini are not perfectly straight, so it can be hard to push a skewer through the middle of the entire thing without it veering off to one side. Cutting the zucchini into shorter lengths helps to keep the skewers centered down the middle.
  • By all means add cheese to the crumb mix if you like. I have previously added finely grated Parmesan and it was delish.
  • This same skewer/cutting technique can be done with potatoes and other vegetables.

Hat Tips

Many thanks to Tasty Recipes for their recipe and instructional video and to the Library of Congress Public Domain Archive for the photo of the James Montgomery Flagg war garden poster.

Twirly zucchini tornadoes with panko topping ready to be roasted
Print
clock clock iconcutlery cutlery iconflag flag iconfolder folder iconinstagram instagram iconpinterest pinterest iconfacebook facebook iconprint print iconsquares squares iconheart heart iconheart solid heart solid icon
Twirly zucchini tornadoes with panko topping ready to be roasted

Roasted Zucchini

5 Stars 4 Stars 3 Stars 2 Stars 1 Star 5 from 1 review
  • Author: Betty
  • Prep Time: 25 minutes
  • Cook Time: 30 minutes
  • Total Time: 55 minutes
  • Yield: 3 servings 1x
Print Recipe

Ingredients

Units Scale
  • 3 zucchini
  • olive oil
  • ¾ cup panko breadcrumbs
  • ½ tsp garlic powder
  • ½ tsp onion powder
  • 1 tsp dried Italian herb blend
  • ½ tsp salt
  • ½ tsp pepper


Instructions

  1. Preheat the oven to 425 F/218 C.
  2. Line a baking sheet with foil or parchment paper and set it aside.
  3. Trim the ends from each zucchini. Push a skewer down the middle of the zucchini lengthwise until the tip of it comes out the other end.
  4. Using a paring knife, cut the zucchini on a diagonal starting at one end while slowly rotating the vegetable. This is easiest to do while the zucchini is on a flat surface and your other hand is rolling the zucchini away from you while you cut. The skewer will stop the knife from cutting all the way through.
  5. Spread out the tornado twirls. It should be one continuous piece with a skewer down the center holding it together. Drizzle with oil.
  6. In a small bowl, combine the panko, garlic powder, onion powder, herb blend, salt, and pepper. Sprinkle the mixture over the zucchini to coat.
  7. Roast at 425 F for 30 minutes, turning over once.

Did you make this recipe?

Please leave a comment below!

Share a photo of your creation by tagging us @betty_eatz

Coconut Lime Zucchini Bread

August 8, 2022

Coconut Lime Zucchini Bread

Zucchini bread with first two slices laying flat surrounding by a pool of delicious lime glaze

Thanks to shredded coconut and lime zest, this Coconut Lime Zucchini Bread recipe brings tropical flavor to the green garden veggie.

Don't Leave Without a Bag of Zucchini

Zucchini season continues. Gardeners, grocery stores, and grandmas are peddling the green squash right now in an attempt to get someone, anyone, to take it. Everyone, please take a bag home with you.

Now when zucchini is cooked right, it’s sublime. But when it’s not, it’s pretty terrible.

At some point in history, someone clever started cutting zucchini into tiny pieces and adding it to sauces, soups, and even bread. Zucchini in bread can be fantastic. It just needs a good squeeze.

Pile of cassette tapes, most likely used by an angst-filled teen to make mix tapes for their friends

Squeeze

If you think this section is going to be about the 80s UK band, I’m sorry it’s not. However, I did listen to a lot of Squeeze's music and am pretty sure Black Coffee in Bed was on several mix tapes that I made for friends. Yes, I was that friend.

Squeezing here refers to what needs to happen to the zucchini once it is shredded. It has a high water content and all that moisture will weigh down your batter if you don’t press it out. Shred, squeeze, then add to the recipe.

By the way, if you are wondering if the band is still touring, they are.

Zucchini sliced in half, two brown eggs, limes sliced in half, and a messy cup of shredded coconut arranged on a wooden cutting board

Best Zucchini Desserts

Listen, I know you are thinking that these three words don’t really go together. Nothing like a chopped-up green vegetable hidden in something sweet. Is deception really delicious?

Because we’ve all had our share of soggy zucchini bread and chocolate zucchini bundt cake gone wrong, I can understand the wariness surrounding green flecks in baked goods. But! This really is a yummy bread that doubles as a dessert.

Baked zucchini bread, naked and unadorned

Unadorned, the bread is moist, but not overly so, and sweet, but not overly so. Add the sweet-tart lime juice glaze, toasted coconut flakes, and lime zest and now you’ve got yourself something special. Proof that those three words do go together after all.

A pile of toasted shredded coconut flakes

Lessons Learned

  • Squeeze the shredded zucchini in batches. I found that doing it in small handfuls allowed me to really wring out the excess water.
  • Take the extra step to toast the coconut before using it as a topping. It adds aroma, flavor, and crunch. It’s worth the 2 minutes it takes in the toaster oven.
  • Garnish with the lime zest just before serving. It will start to discolor and go slightly brown after the first day.

Hat Tips

Thanks to Diane Morrissey for the coconut lime zucchini bread inspiration and Bruno Guerrero on Unsplash for the retro cassette photo.

Zucchini bread iced with lime glaze and topped with shredded coconut and lime zest. Also a random whisk and scratched up lime
Print
clock clock iconcutlery cutlery iconflag flag iconfolder folder iconinstagram instagram iconpinterest pinterest iconfacebook facebook iconprint print iconsquares squares iconheart heart iconheart solid heart solid icon
Zucchini bread with first two slices laying flat surrounding by a pool of delicious lime glaze

Coconut Lime Zucchini Bread

5 Stars 4 Stars 3 Stars 2 Stars 1 Star No reviews
  • Author: Betty
  • Prep Time: 30 minutes
  • Cook Time: 50 minutes
  • Total Time: 1 hour 20 minutes
  • Yield: 10 slices 1x
Print Recipe

Ingredients

Units Scale

Bread

  • ⅓ cup neutral flavored oil
  • ½ cup plain Greek yogurt
  • 1 Tbsp. lime juice
  • 1 tsp vanilla
  • ¾ cup granulated sugar
  • 2 medium eggs
  • 1 ½ cups all-purpose flour
  • ½ tsp baking soda
  • ⅛ tsp baking powder
  • 2 Tbsp lime zest
  • ½ tsp salt
  • 1 cup shredded zucchini
  • ¾ cup unsweetened coconut flakes

Topping

  • ½ cup powdered sugar
  • 1 Tbsp lime juice
  • ¼ cup toasted unsweetened coconut flakes
  • 1 Tbsp lime zest


Instructions

  1. Preheat oven to 350 F/176 C. Place parchment paper into loaf pan (either 8 ½ x 4 ½ or 9 x 5 is fine). 
  2. Combine the oil, yogurt, juice, vanilla, and sugar in a mixer and stir to combine. Crack and add one egg and mix to combine, allowing the batter to emulsify. Repeat with the other egg and mix well. 
  3. Stir together the dry ingredients: flour, baking soda, baking powder, lime zest, and salt. Add it to the wet mixture and gently mix together. 
  4. Squeeze the shredded zucchini to get rid of excess moisture then add it to the batter along with the coconut flakes. Stir everything together.
  5. Pour the batter into the prepared pan and smooth the top. Bake at 350 F/176 C for 50 minutes. The top should be golden brown and a tester inserted in the middle of the loaf should come out clean. Remove from the oven and allow to cool on a wire rack for 10 minutes. Gently lift the bread by the parchment paper overhang out of the pan and continue to cool on the rack.
  6. Make the glaze while the bread is cooling by whisking together the powdered sugar and lime juice. Adjust the amount of juice to get the glaze consistency you like. Use a spoon to drizzle the glaze over the top of the bread. Sprinkle with toasted coconut and lime zest before serving. 

Did you make this recipe?

Please leave a comment below!

Share a photo of your creation by tagging us @betty_eatz

Zucchini Ribbon Salad

August 1, 2022

Zucchini Ribbon Salad

Ribbons of sliced zucchini nestled in a white Mikasa bowl that I received as a wedding gift.

Zucchini Ribbon Salad is a fresh and refreshing way to to enjoy the summer bounty.

A Summer Salad in Season

People have a love or hate relationship with zucchini. Has someone gifted you with a bag of it from their garden or are you tempted by the low price of it at the grocery store? This cool zucchini ribbon salad may convert you into a zucchini believer, regardless of whether you love it or loathe it.

If you like to eat your veggies in season as I do, you will be happy to know there is a zucchini recipe coming your way each week this month! You may be tempted to try one (or all) of the recipes even if you don't consider yourself a zucchini aficionado. Yes, they are that good!

Zucchini, lemon, arugula, pine nuts on a wooden cutting board

Cooling Foods

Foods that are high in water content help keep us hydrated and cool, particularly during the summer. Cucumber, peaches, lettuce, tomatoes, watermelon, and yes, zucchini, all contain a lot of water and also happen to be in season. Zucchini contains 90 percent water along with dietary roughage, meaning that it provides fluids and fiber to your diet.

Thin slices of zucchini on a wooden cutting board and in my hands

Courgette

Sometimes, zucchini is referred to as courgette in recipes, particularly those that originate in the U.K. They are the same thing. But I think courgette is way more fun to say.

This salad also incorporates arugula in the dressing. It is called rocket in the U.K. Just think! We could rename this salad: Courgette and Rocket.

Zesting a lemon and trying not to cut myself, plus mint, basil, arugula, and pine nuts on a cutting board

Lessons Learned

  • You may be able to get your slices thin enough if you have great knife skills. I don't, so I use a mandolin slicer and it is worth every penny.
  • The pesto-like dressing can be made a day ahead and kept in the fridge.
  • This salad is best the day it is assembled. The zucchini softens overnight if you kept leftovers. The salad is still good the next day, but beyond that, it starts to go downhill.

Hat Tips

Zucchini ribbon salad inspo came from recipes by Alton Brown and Tia Mowry, both from Food Network.

Close up of pesto dressing on a pretty spatula
Print
clock clock iconcutlery cutlery iconflag flag iconfolder folder iconinstagram instagram iconpinterest pinterest iconfacebook facebook iconprint print iconsquares squares iconheart heart iconheart solid heart solid icon
Ribbons of sliced zucchini nestled in a white Mikasa bowl that I received as a wedding gift.

Zucchini Ribbon Salad

5 Stars 4 Stars 3 Stars 2 Stars 1 Star No reviews
  • Author: Betty
  • Prep Time: 20 minutes
  • Total Time: 20 minutes
Print Recipe

Ingredients

Units Scale
  • 1 cup arugula
  • ¼ cup fresh basil leaves
  • ¼ cup fresh mint leaves
  • 3 Tbsp pine nuts, toasted
  • 1 clove garlic
  • 2 Tbsp lemon zest
  • 1 Tbsp lemon juice
  • ¼ cup extra-virgin olive oil
  • 2 or 3 zucchini


Instructions

  1. Combine the arugula, basil, mint, pine nuts, garlic, lemon zest, and lemon juice in a blender or food processor. Season with salt and pepper. Pulse a few times to roughly chop ingredients. Add the oil while the blender is running and blend until smooth. Pour into a large bowl.
  2. Trim the ends from the zucchini. Slice lengthwise into thin ribbons using a mandolin or Y-peeler. Add ribbons to the bowl containing the dressing mixture and toss to combine. Garnish with additional pine nuts, if desired.

Did you make this recipe?

Please leave a comment below!

Share a photo of your creation by tagging us @betty_eatz

Mango Pineapple Hand Pies

July 25, 2022

Mango Pineapple Hand Pies

hand pies sitting pretty on a white rectangular tray

This installment of Friday Pie Day brings Mango Pineapple Hand Pies filled with fresh mango and canned pineapple cooked down into a jam.

Friday Pie Day

Are you a person that likes themes? You know, like middle school crazy hat day, luau birthday party, or Hitchcock movie marathon in October. It's fun, right?

If you follow me on Instagram, you know I've been doing Friday Pie Day every week this month. The end of the week calls for a mini celebration. So, pie it is!

Typically, a pie is round and cut into triangular pieces. Depending on the filling, it can be a messy affair. But smaller hand pies are easier to eat and great for toting to potlucks and picnics at the beach.

But watch out for the Portuguese man o'war.

Close up of Portuguese man o'war washed up on the sand

Man o'War

Natural things that wash up on the shore are called beach wrack. Examples include seaweed, driftwood, and small invertebrates. The occasional fish, crab, or jellyfish will also get left behind by the tide and wind up stranded to bake in the sun.

This summer, there have been scads of Portuguese man o'war in Atlantic waters.

They live in tropical and subtropical oceans and their gas-filled translucent bladders look like discarded plastic baggies on the shoreline. Long tentacles inject venom upon contact, even if they are detached from the main body. If you are stung, vinegar and heat are your friends.

We managed to avoid them on our beach outing while on vacation in Bermuda, but the couple next to us was not as fortunate. After they got stung, we left the beach that day, taking our hand pies with us.

Pie dough rolled out with a dollop of filling in the middle

Mango Pineapple Hand Pies or Empanadas?

Hand pies are sometimes called empanadas, pasties, or turnovers. They can be filled with meat, veggies, or fruits. For this recipe, we are using two kinds of fruit: mango and pineapple.

Fresh mango, canned pineapple, and spices laid out on a wooden cutting board

Using canned crushed pineapple saves you the trouble of peeling and chopping, but you can use fresh if you like. I chose to use fresh mango since I had grabbed one at the local market, but frozen will work too. The two flavors together: major tropical vibes!

Prebaked pies on parchment paper, awaiting oven time

Lessons Learned

  • If the filling is being teenager-ish and not behaving as you want, you can do something about it. To make the filling less runny, combine 1 Tablespoon of cold water with 1 Tablespoon of cornstarch and mix. Stir the cornstarch slurry into the simmering filling and continue to cook until it thickens.
  • Both the cooled filling and dough can be refrigerated for up to two days before assembling and baking the hand pies.
  • Don't forget to make a steam vent on the tops of the pies! Whether you dock with a fork or cut with a paring knife, make a way for the steam to escape or it will find a way out and usually in an unfortunate place. It's hard to see the holes in these photos, but they are there!

Hat Tips

Like most of the recipes I feature, this one is not my creation. I find, try, and adapt recipes, then share them with you. Thanks go to King Arthur Flour, Sugar Geek Show, and Muy Bueno for their hand pie recipe inspiration!

Baked pie bitten in half to show the luscious inside with other baked pies lounging in the background
Print
clock clock iconcutlery cutlery iconflag flag iconfolder folder iconinstagram instagram iconpinterest pinterest iconfacebook facebook iconprint print iconsquares squares iconheart heart iconheart solid heart solid icon
hand pies sitting pretty on a white rectangular tray

Mango Pineapple Hand Pies

5 Stars 4 Stars 3 Stars 2 Stars 1 Star No reviews
  • Author: Betty
  • Prep Time: 30 minutes
  • Chill Time: 1 hour
  • Cook Time: 20 minutes
  • Total Time: 50 minutes plus chill time
  • Yield: 12 1x
Print Recipe

Ingredients

Units Scale

Filling:

  • 8 oz. can crushed pineapple, drained
  • 1 mango, peeled and diced
  • Juice of 1 lime, about 2 Tbsp
  • ⅛ tsp ground cinnamon
  • ⅛ tsp ground ginger
  • ⅛ tsp ground nutmeg
  • ⅓ cup white or palm sugar
  • ½ tsp lime zest

Dough:

  • 1 ½ cups all-purpose flour
  • ½ tsp baking powder
  • ¼ tsp salt
  • ½ cup butter
  • 1 egg
  • 3 Tbsp cold water

Egg Wash:

  • 1 egg, beaten
  • 1 Tbsp water


Instructions

  1. Combine pineapple, mango, lime juice, cinnamon, ginger, nutmeg, sugar, and zest in a small saucepan and bring to a boil over medium-high heat. Lower heat and simmer for 15 to 20 minutes until thickened and jam-like. Remove from heat and let cool.
  2. To make the dough, whisk together flour, baking powder, and salt in a medium bowl. Cut the butter into small pieces and add to the dry mixture. Rub the butter into the flour mixture with your fingertips until the butter is incorporated and pea-sized. 
  3. Mix egg and water together and add to the bowl. Stir with a spoon, then use your hand to gently knead the ingredients into a cohesive ball of dough. Split the dough into two pieces, wrap in plastic wrap, and place in the fridge to chill for 1 hour.
  4. Preheat the oven to 400 F/204 C. Line two baking sheets with parchment paper and set aside.
  5. Remove one dough packet from the fridge and divide it into 6 equal size balls. Lightly flour a smooth surface and roll dough balls into circles about 5 or 6 inches in diameter. Place 1 heaping Tablespoon of the filling in the center of each circle. Brush the edges of the circle with the egg wash before folding the circle in half to enclose the filling. Press the edges with the tines of a fork to seal them. Repeat with the remaining dough.
  6. Using a pastry brush, sweep the tops of each hand pie with the egg wash. Prick the tops with a fork to allow steam to escape. Chill the filled pies in the fridge for 20 minutes.
  7. Bake for 15 to 20 minutes at 400 F or until golden brown. Remove from the oven and cool on a wire rack. Allow them to cool entirely before biting into hand pies or the roof of your mouth will be mad. Can be served slightly warm or at room temperature.

Did you make this recipe?

Please leave a comment below!

Share a photo of your creation by tagging us @betty_eatz

Ginger Cashew Chicken Salad

July 18, 2022

Ginger Cashew Chicken Salad

Sliced grilled chicken atop salad greens with mandarin oranges and cashews

This bright and fresh Ginger Cashew Chicken Salad makes an easy meal!

Bring the Zing

Salads are a go-to dinner and a fast pain-free meal in summer, or really any time of year. It is easy, however, to fall into a rut of making the same type week after week. Greens and chicken, greens and steak, greens and fish.

Yawn.

Solution? Bring some zing! Three easy ways to do that are toppings, dressings, and a special root: ginger.

Peeled and sliced fresh ginger

Benefits of Ginger

Fresh ginger, the root of the flowering plant called zingiber officinale, has been used for centuries in cooking and traditional medicine. One of its main benefits: settling the tummy. It aids in digestion, bloating, and nausea.

If you have stomach issues or have ever been pregnant, you know this.

There is also some evidence that ginger contains antioxidant and anti-inflammatory compounds. In addition to supporting gastrointestinal and general well-being, it is a delicious addition to food and beverages.

Sweet, warm, and zesty, ginger appears in both sweet and savory dishes. In this salad, ginger shows up in the marinade and dressing.

chicken breasts soaking in marinade

Homemade Ginger Cashew Chicken Salad Dressing

Anything that doubles as both marinade and salad dressing earns heart eyes in my book. And that is the case here. One batch of dressing, two uses. Pour some over the chicken and save the rest to dress the salad.

Two surprise ingredients that make this dressing different are fresh minced ginger and mild molasses. Whaaat? Yes, my mind went down the gingerbread trail too, but really, it works here.

plate of salad greens, bowl of mandarin oranges, cut red onion, green onion, and carrot

Salad Toppings

Depending on the type of salad person you are, you either love toppings or think they are just meh. Salad toppings are worth their weight in gold at my house. They can make or break a salad.

This particular salad has crunchy, tender, salty, and sweet toppings. Scattered over fresh greens, grilled chicken, and the zingy ginger vinaigrette, they offer something different in each forkful.

Plus, they are pretty.

raw meat and marinade ingredients on a wooden cutting board

Lessons Learned

  • Cut the chicken breasts lengthwise into two thinner cutlets. This gives you a piece of chicken that cooks quicker, soaks up more marinade, and is more likely to be the recommended 4-ounce single serving size.
  • Don’t marinate the chicken overnight. This marinade/dressing contains vinegar and an overnight soak will break down the connective tissue in the meat making it tough once cooked. Marinating anywhere between 3 and 8 hours is perfect!
  • Cashews add a subtle buttery-ness and soft crunch, but if you don’t like them substitute another type of nut.

Hat Tips

Many thanks to Taste of Home for their recipe!

Assembled salad in all it's green and orange glory
Print
clock clock iconcutlery cutlery iconflag flag iconfolder folder iconinstagram instagram iconpinterest pinterest iconfacebook facebook iconprint print iconsquares squares iconheart heart iconheart solid heart solid icon
Sliced grilled chicken atop salad greens with mandarin oranges and cashews

Ginger Cashew Chicken Salad

5 Stars 4 Stars 3 Stars 2 Stars 1 Star No reviews
  • Author: Betty
  • Prep Time: 20 minutes
  • Marinating Time: 3 hours
  • Cook Time: 10 minutes
  • Total Time: 30 minutes plus marinating
Print Recipe

Ingredients

Units Scale

Dressing:

  • ½ cup cider vinegar
  • ½ cup molasses
  • ⅓ cup canola oil
  • 2 Tablespoons minced fresh gingerroot
  • 1 Tablespoon minced garlic
  • 2 teaspoons reduced-sodium soy sauce
  • 1 teaspoon salt

Salad:

  • 2 to 3 boneless skinless chicken breast halves
  • 10 cups of greens (spring mix, spinach, arugula, etc)
  • 1 can (11 ounces) mandarin oranges, drained
  • 1 cup shredded cabbage
  • 1 medium carrot, shredded
  • ½ cup thinly sliced red onion, soaked in water and drained

Garnish:

  • 3 green onions, thinly sliced
  • ¾ cup roasted salted cashews


Instructions

  1. Combine all the dressing ingredients in a bowl or mason jar and mix to incorporate. Measure out ¾ cup of the dressing to use as a marinade. Cover and refrigerate the remaining dressing until ready to use.
  2. Cut one of the chicken breasts lengthwise and horizontally into two cutlets of equal thickness. Repeat with the remaining chicken breasts. The thinner cutlets will soak up the marinade and will cook more quickly.
  3. Pour the reserved ¾ cup of dressing over the prepared chicken. Cover and allow to marinate in the fridge for at least 3 hours or up to 8 hours.
  4. Preheat the grill. Remove the chicken from the marinade and discard the marinade. Once the grill is hot, cook the chicken for 4 minutes on each side or until the inside temp reaches 165 F.
  5. Arrange the greens, mandarin oranges, cabbage, carrots, and red onion on a serving platter or individual plates. Slice the chicken against the grain and place it on top of the salad greens.
  6. Drizzle the salad with the dressing and garnish with green onions and cashews.

Did you make this recipe?

Please leave a comment below!

Share a photo of your creation by tagging us @betty_eatz

Apple Pie with Cheddar Crust

July 11, 2022

Apple Pie with Cheddar Crust

Baked apple pie with cheddar crust

Apple pie is a quintessential American dessert. It also happens to be my husband’s favorite pie. He likes a traditional version, not too sweet with a dash of cinnamon, made with Golden Delicious apples.

But I occasionally get middle-aged wild and do something different.

Granny Smith and Gala apples on a wooden board

Apple Pie with Cheese

An apple pie without cheese is like a kiss without a squeeze.

Depending on where you grew up in the United States, you either eat your pie with a side of ice cream (called a la mode) or with a slice of cheddar cheese on top. Mostly folks in the Midwest and New England seem to be in the pie with cheese camp.

Vermont, where apple pie is the official state pie, even has laws regarding how the pie is to be served. The law reads:

When serving apple pie in Vermont, a "good faith" effort shall be made to meet one of more of the following conditions:

(a) with a glass of cold milk,

(b) with a slice of cheddar cheese weighing a minimum of ½ ounce,

(c) with a large scoop of vanilla ice cream.

That is some major dedication to having dairy with your pie.

Shredded cheddar cheese

Cheddar

Buttery white or bright orange, cheddar is among the five most popular kinds of cheese in the U.S. When young, cheddar is mild and slightly nutty. If aged over six months, the cheese progresses to develop tangy and more complex flavors that are perfect with fruit, especially apples.

Peeled Granny Smith apple

Best Apples for Apple Pie

Can you use any kind of apple for pie baking? You can, but you might not get the results you want. Some apple varieties are better eaten raw as snacks because they break down to mush when baked.

Apples that hold their shape and their apple-y taste after being cooked are what you are looking for when it comes to the perfect pie.

Using a single variety? Golden Delicious or Braeburn is the way to go. They both retain their shaped when baked and don't descend into applesauce territory.

Using two types? A combination of Granny Smith for tartness and Gala for sweetness produces a good balance of apple flavor and aroma. These varieties also bake well.

Unbaked pie shell

Homemade Pie

Yes, making a homemade pie takes time. But we all know the results far outweigh the effort put into it. Plus, you can customize the crust and the filling to your liking.

This next-level apple pie includes browned butter in the filling, adding a slight nuttiness and depth. The crust? Why the cheese is baked right in, thank you.

Unbaked apple pie with lattice crust

Lessons Learned

  • Don't be afraid of the cheddar. No one is going to mistake this for a quesadilla. The cheese gives the crust some salty notes which complement the sweet filling.
  • Take the extra time to chill your pie crust. I know you don't want to. But skipping this step may cause your crust to produce the dreaded soggy bottom. Paul and Prue would not approve.
  • Use whatever apples you like, but aim for a combination of tart and sweet varieties.

Hat Tips

Many thanks go to Jenny Park at Spoon Fork Bacon for her recipe!

Side view of sliced apple pie
Print
clock clock iconcutlery cutlery iconflag flag iconfolder folder iconinstagram instagram iconpinterest pinterest iconfacebook facebook iconprint print iconsquares squares iconheart heart iconheart solid heart solid icon
Baked apple pie with cheddar crust

Apple Pie with Cheddar Crust

5 Stars 4 Stars 3 Stars 2 Stars 1 Star No reviews
  • Author: Betty
  • Prep Time: 30 minutes
  • Chilling Time: 1 hour 30 minutes
  • Cook Time: 1 hour
  • Total Time: 3 hours
  • Yield: 8 slices 1x
Print Recipe

Ingredients

Units Scale

Crust:

  • 2 ½ cups all-purpose flour
  • 2 teaspoons sugar
  • 1 cup cold salted butter, frozen and grated
  • ¾ cup grated sharp cheddar cheese
  • 3 to 5 tablespoons ice water

Filling:

  • 4 Granny Smith apples, peeled and thinly sliced
  • 4 Gala apples, peeled and thinly sliced
  • 3 Tbsp. lemon juice
  • ⅔ cup light brown sugar
  • ⅓ cup sugar
  • 1 ½ teaspoons ground cinnamon
  • ½ teaspoon ground nutmeg
  • ¼ teaspoon salt
  • 3 tablespoons corn starch
  • ¼ cup browned butter, melted and cooled

Egg Wash:

  • 1 egg
  • 1 Tablespoon water


Instructions

  1. Combine the flour, sugar, and butter in a bowl. Dump in the cheddar cheese and mix with the flour. Sprinkle water evenly over the mixture and gently stir until incorporated.  Gently squeeze a portion of dough to see if it holds together. If you need more water, add it 1 tablespoon at a time.
  2. Turn out the dough onto a work surface and divide it in half. Form each half into a disk and wrap it in plastic wrap. Chill in the fridge until firm, at least 1 hour.
  3. Mix together all the filling ingredients, except for the browned butter. Let the filling sit for 1 hour to macerate. If you haven’t browned the butter yet, you can do this step now by placing the butter in a small saucepan and letting it melt over low heat. Watch the butter so it doesn’t burn and remove it from the heat once it reaches a golden brown color. Set aside and let cool.
  4. Roll out one dough disk on a floured surface and place it into a 9-inch deep-dish pie pan. Add the cooled butter into the apple mixture and stir to combine. Pour the mixture into the pie shell then refrigerate while you roll out the top crust.
  5. Use the remaining dough disk to make the top crust. Roll out in one piece to cover the pie or cut into strips to make a lattice top. Combine the egg and water to make the egg wash, then brush the top crust with it. Refrigerate the pie for 30 minutes before baking.
  6. Bake the pie at 400 F/204 C for 15 minutes, then lower the heat to 375 F/190 C and bake for 45 minutes more. Let the pie cool completely before slicing.  

Did you make this recipe?

Please leave a comment below!

Share a photo of your creation by tagging us @betty_eatz

Preserved Lemon Loaf Cake

July 4, 2022

Preserved Lemon Loaf Cake

Lemon loaf cake sliced on parchment paper

Bright, yellow, and sunshiny! Is this a description of:
A) Your summer so far
B) Preserved Lemon Loaf Cake
C) The T-shirt I’m wearing
D) All of the above

Hint: the answer is D!

Rays of sunlight shining through branches of lemon tree

When Does Summer Start

Summer is officially here according to the calendar on my phone. But only recently did I learn that there is an astronomical start and a meteorological start to each season.

What’s the difference?

The astronomical start of a season is based on the earth’s position in relation to the sun. The meteorological start is based on the annual temperature cycle and 12-month calendar. So in the Northern Hemisphere the first day of summer, astronomically speaking, was June 21. But the meteorological start was back on June 1.

You very well know when summer has begun if you live in a warm climate as I do. A tell-tale sign: driving the parking lot multiple times while looking for a shady parking spot.

Another sign: lemonade. Fresh lemons are available year-round to squeeze into beverages, salads, and marinades but are especially refreshing in summer. If you are like me, you also have some preserved lemons on hand.

Eggs, oil, sugar, preserved lemon paste all on a wooden cutting board

How to Use Preserved Lemons

Preserved lemons are lemons that have been cured in their juices with plenty of salt. They provide a bright, tangy, umami hit to meats, veggies, pasta, and anywhere else you would add fresh lemon. Plus, they are so easy to make!

Once they are cured, the preserved lemons can be blended with the juices to make a preserved lemon paste.

An unexpected and out-of-the-ordinary place to use preserved lemons is in baked goods. One of my favorites is this preserved lemon loaf cake. It is lemony, not-too-sweet, and the color of sunshine.

Batter in loaf pan lined with parchment paper

Preserved lemons are pureed and added to the batter of this loaf cake, giving it some major citrusy notes and summer vibes. To amp up the lemony color: ground turmeric.

Close up of the top of a baked lemon loaf

Lessons Learned

  • Be sure to measure the amount of preserved lemon paste correctly. If you are blending your jar of preserved lemons down into a paste, you will only need 2 ounces or about 55 grams. If you are heavy-handed with the paste, you run the risk of your cake being too salty.
  • Don't stress if you don't have sour cream. I subbed in plain Greek yogurt and it worked great.
  • You can skip the turmeric if you don't have it, but your cake will be barely yellow instead of sunshine bright.

Hat Tips

Thanks go to Zaynab Issa at Bon Appetit for her recipe!

Cross section slice of loaf showing the inside
Print
clock clock iconcutlery cutlery iconflag flag iconfolder folder iconinstagram instagram iconpinterest pinterest iconfacebook facebook iconprint print iconsquares squares iconheart heart iconheart solid heart solid icon
Lemon loaf cake sliced on parchment paper

Preserved Lemon Loaf Cake

5 Stars 4 Stars 3 Stars 2 Stars 1 Star No reviews
  • Author: Betty
  • Prep Time: 20 minutes
  • Cook Time: 60 minutes
  • Total Time: 1 hour 20 minutes
  • Yield: 10 slices 1x
Print Recipe

Ingredients

Units Scale
  • 1 ½ cups all-purpose flour
  • 2 tsp. baking powder
  • ½ tsp. ground turmeric
  • 3 large eggs
  • 1 cup plus 2 tablespoon. granulated sugar
  • ½ cup sour cream
  • ½ cup extra-virgin olive oil
  • 1 Tbsp. finely grated lemon zest
  • 3 Tbsp. fresh lemon juice
  • 2 oz. preserved lemon paste
  • ¾ cup powdered sugar
  • 1 Tbsp. whole milk


Instructions

  1. Preheat the oven to 350 F/177 C. Line an 8 ½ x 4 ½ inch loaf pan with parchment paper, leaving the overhang on the longer sides, and spray with non-stick spray oil.
  2. Combine the flour, baking powder, and turmeric in a bowl. Whisk to mix and set aside. 
  3. Add the eggs, sugar, sour cream, and oil to the bowl of a stand mixer. Beat together with the paddle attachment until combined. Add lemon zest, lemon juice, and preserved lemon paste to the egg mixture and mix until smooth. 
  4. Tip the flour mixture into the wet ingredients and mix on low speed, just until combined. Pour the batter into the prepared pan and smooth the top with a spatula or the back of a spoon.
  5. Bake at 350 F for 50 to 60 minutes. The top should be golden brown and a toothpick inserted into the center of the loaf should come out clean. Remove from the oven and let cool for 15 minutes on a wire rack. Using the parchment overhang, lift the cake out of the pan and place it on the rack. Remove the parchment and let the cake continue to cool.
  6. To make the glaze: Whisk together the powdered sugar and milk in a small bowl. Drizzle the glaze over the cake. Let the glaze set before slicing. Cake can be stored covered at room temperature for 3 days. 

Did you make this recipe?

Please leave a comment below!

Share a photo of your creation by tagging us @betty_eatz

Korean BBQ Ribs (LA Galbi)

June 27, 2022

Korean BBQ Ribs (LA Galbi)

Grilled beef short ribs with chopped green onions and sesame seeds

Do you love grilling as much as I do? I especially like to make Korean BBQ Ribs (sometimes called Korean short ribs or LA galbi) on the barbecue. The outdoor grill cooks them fast and provides a nice char on the meaty edges.

It’s also great that cooking meat, fish, veggies, and pizza on the backyard grill prevents my kitchen from heating up in the summertime. And after a day inside looking at a computer screen, it’s so nice to be outdoors.

Except for the mosquitos.

Bug repellent spray and lotion

Why are Mosquitos Attracted to Me?

Mosquitos are attracted to people who exhale, are hot and sweaty, and wear black. This describes just about every menopausal woman I know including myself.

So ladies, what now?

  • Sit near a fan. This shouldn’t be hard for those with hot flashes. Mosquitos are flimsy things so a stiff breeze helps keep them away.
  • Wear repellent. I’m not opposed to DEET-based sprays every once in a while. For everyday use, I wear either Off! Botanical Plant-based Repellent or Avon’s Skin So Soft Bug Guard Lotion.
  • Avoid beer and chips. I know it isn’t going to happen but I thought I’d mention it. Mosquitos like the lactic acid your body produces after you eat salty snacks and drink beer.

Some other potential solutions? Wear white. Maybe eat ribs. But not at the same time.

Beef short ribs on the grill

How to Cook Ribs on the Grill

A rack of beef ribs or slab of pork ribs can take anywhere from one to six hours on the grill, depending on the heat, if you are smoking them, and how tender you want them. And while these ribs are delicious, sometimes you want some that are ready a lot faster. Solution: LA galbi.

Uncooked beef shorts ribs cut crosswise
Garlic, ginger, onion, apple and other marinade ingredients in a bowl

The meat used for Korean BBQ ribs is labeled LA-style cut and is cut laterally across the bones. These long strips of meat are around one-quarter inch thick with each strip containing three or four bone sections. After soaking in a soy sauce marinade, the ribs can be cooked in the oven, on the stovetop, or on the barbecue grill.

Because they are thin, they cook fast! How fast? In about the same amount of time it takes to grill a burger: three to four minutes per side.

What to Serve with Korean Short Ribs

My mom is Korean so I grew up eating these ribs with a side of steamed rice and homemade kimchi. Most Korean restaurants will serve these with a variety of banchan (side dishes) like cucumber salad, seasoned bean sprouts, spinach salad, and other pickled items. The acidity in these side dishes cuts through the meatiness of the ribs and complements them nicely.

Close up of grilled beef short ribs

Lessons Learned

  • Rinse the ribs before marinating them. When the bones are cut laterally, they can leave tiny bone fragments clinging to the meat. A quick rinse under cold running water will remove them and prevent any grittiness.
  • Leave enough time for the ribs to marinate. Overnight is best, but six to eight hours work, too.
  • Don’t freak out if you slightly overcook these. The marinade and the fat keep it tender even if you cook them past the 10-minute mark. Total cooking time depends on the thickness of the ribs, so they may need a longer or shorter time on the barbecue.

Hat Tips

Many thanks (kamsahamnida!) go to Korean Bapsang and My Korean Kitchen for their inspiring LA Galbi recipes.

Pile of grilled beef short ribs
Print
clock clock iconcutlery cutlery iconflag flag iconfolder folder iconinstagram instagram iconpinterest pinterest iconfacebook facebook iconprint print iconsquares squares iconheart heart iconheart solid heart solid icon
Pile of grilled beef short ribs

Korean BBQ Ribs (LA Galbi)

5 Stars 4 Stars 3 Stars 2 Stars 1 Star No reviews
  • Author: Betty
  • Prep Time: 30 minutes
  • Marinating Time: 24 hours
  • Cook Time: 10 minutes
  • Total Time: 40 minutes plus overnight
  • Yield: 4 servings 1x
Print Recipe

Ingredients

Units Scale

Marinade:

  • ⅓ cup soy sauce
  • ⅓ cup brown sugar
  • 2 Tbsp. mirin or rice wine
  • 1 Tbsp. toasted sesame oil
  • ¼ cup grated Asian pear or apple
  • ¼ cup grated onion
  • 3 cloves minced garlic
  • 2 tsp. minced ginger
  • 1 tsp. fresh ground black pepper

Ribs:

  • 2 lbs. beef short ribs, LA-style cut
  • 3 green onions, sliced on diagonal
  • Toasted sesame seeds


Instructions

  1. Combine all the marinade ingredients in a blender and whiz until it is totally incorporated. Alternatively, you can place them in a bowl and use an immersion blender.
  2. Pour marinade over ribs, cover, and refrigerate overnight (or at least six hours). Marinating in a Ziploc bag makes it easier to flip the bag in the morning so the other side of the ribs gets soaked.
  3. To cook on the grill: Preheat the grill to medium-high heat. Remove the ribs from the marinade and discard the marinade. Place the ribs on the hot grill and cook on each side for three to four minutes, turning once. You should see caramelized edges. Top with green onions and a sprinkling of sesame seeds. 
  4. To cook in the oven: Preheat the oven broiler. Place the ribs in a single layer on a broiler pan or rimmed baking sheet. Broil on the top rack about six inches below the broiler. Allow four to five minutes per side, turning once. 
  5. To cook on the stovetop: Heat a large or cast-iron skillet over high heat. When the pan is hot add a teaspoon or two of oil. Place ribs in a single layer in the pan and cook for three minutes on each side, turning once.  

Did you make this recipe?

Please leave a comment below!

Share a photo of your creation by tagging us @betty_eatz

Lemon and Herb Potato Salad

June 20, 2022

Lemon and Herb Potato Salad

Pan of lemon herb potato salad

A perfect food to bring to the beach: Lemon and Herb Potato Salad!

Summer has arrived. School is out, the weather is heating up, and the beach is calling. My google searches right now consist of cute sunglasses, tummy-minimizing swimsuits, and best beachy picnic food recipes.

How about you?

Rocky sand beach and ocean with sea cliff

Best California Beaches

If you live in California, you might disagree with what I'm about to say right now. You probably have a favorite beach and no one is going to change your mind about it. I respect that.

But! If you live outside of California and are interested in some beautiful beaches to visit, I have several to recommend. These are beaches that I regularly visit and love. A caveat: these are all located in Southern California.

Seven favorite beaches are:

  • Crystal Cove Beach
  • Coronado Beach on Coronado Island
  • Descanso Beach on Catalina Island
  • Laguna Main Beach
  • Tamarack Beach (aka Carlsbad State Beach)
  • Thousand Steps Beach
  • Torrey Pines State Beach (pictured above!)

What to bring with you? Low profile beach chairs, a large beach umbrella, a good book, and some no-mayo potato salad.

Baby potatoes, green onions, lemon, parsley on a wooden cutting board

Beach Picnic Food

Mayo-less anything is the way to go when packing food for the beach. Commercially made mayo is unlikely to go bad in the heat if it is by itself but combined with other ingredients it can turn and taste weird. Way to ruin a nice day at the beach!

This no-mayo potato salad is the perfect beach picnic food. The lemony vinaigrette provides a nice zing to the tender potatoes and fresh herbs. A bonus: this salad tastes great at room temperature (or beach temperature).

Plus, it's pretty.

Lemon herb salad dressing in a mason jar
Prepared baby potatoes, jar of dressing, chopped herbs on a wooden cutting board

Lessons Learned

  • Don't boil the potatoes too long or they will fall apart. Kind of like I did after watching the final episode of Poldark.
  • This keeps well overnight in the fridge so you can make it the day before.
  • If you especially like lemon, consider doubling the amount of lemon zest. I tried that and loved it.

Hat Tips

Many thanks go to Nagi at Recipe Tin Eats for this delicious potato salad recipe!

Close up of lemon and herb potato salad
Print
clock clock iconcutlery cutlery iconflag flag iconfolder folder iconinstagram instagram iconpinterest pinterest iconfacebook facebook iconprint print iconsquares squares iconheart heart iconheart solid heart solid icon
Pan of lemon herb potato salad

Lemon and Herb Potato Salad

5 Stars 4 Stars 3 Stars 2 Stars 1 Star No reviews
  • Author: Betty
  • Prep Time: 10 minutes
  • Cook Time: 5 minutes
  • Total Time: 15 minutes
  • Yield: 6 servings 1x
  • Category: Salads
Print Recipe

Ingredients

Scale

Dressing:

5 Tbsp. olive oil

¼ cup fresh lemon juice

1 Tbsp. lemon zest

1 garlic clove, minced

1 tsp. Dijon mustard

1 tsp. sugar

1 tsp. salt

½ tsp. black pepper

Salad:

2 lbs. baby potatoes

1 Tbsp. salt

1 cup chopped green onions

¼ cup chopped fresh parsley

2 Tbsp. chopped fresh thyme


Instructions

  1. Combine all dressing ingredients in a pint-size mason jar, cover, and shake until incorporated.
  2. Bring 4 quarts of water to boil in a large pot while you chop the potatoes in half. Once the water is boiling, add salt and the halved potatoes. Cook for 5 minutes and drain.
  3. Transfer potatoes to a bowl or 9x13 pan and pour half of the dressing over the hot potatoes. Stir to distribute dressing. Allow them to marinate for 30 minutes.
  4. Top with green onions, parsley, and thyme. Pour remaining dressing over potatoes and gently stir all together. Serve at room temperature. Store leftovers covered in the fridge.

Did you make this recipe?

Please leave a comment below!

Share a photo of your creation by tagging us @betty_eatz

Homemade Egg Pasta

June 13, 2022

Homemade Egg Pasta

Close up of fresh egg pasta noodles

There is nothing like the silky taste and comforting chew of homemade egg pasta!

Easier than Ironing Sheets

Have you eaten fresh homemade pasta? If you have, you know it is a completely different food than boxed pasta. One is not better than the other, but they are miles apart in texture and taste.

Boxed dried pasta is meant to last. It is made from semolina flour and water, dried, and able to be stored almost indefinitely. This is the pasta that pairs well with hearty tomato sauces and ragus.

Fresh pasta should be eaten within a day or so of being made. Made from eggs and finely milled flour, it is soft, smooth, and delicate. It's delicious with cream-based sauces.

You may be thinking fresh homemade pasta is difficult to make. It's not! I think it's easier to do than ironing bed sheets.

Bicycle riders stopped in front of grocery shop in Rome

How to Iron Sheets

Have you ever slept in a bed in which the cotton sheets had been ironed? My first time was in Italy. I think the hardworking housekeepers at the Albergo Santa Chiara must have put freshly ironed sheets on our beds daily.

After spending the day exploring Rome with my mom and eldest son, we would return to the hotel each evening in anticipation of bedtime. It’s hard to believe that while on vacation in the Eternal City one of the highlights of the day was sliding into bed between cool, crisp sheets.

The feeling is so dreamy and luxurious!

So, how does one iron cotton bed linens? Slightly damp sheets + light starch + high heat iron = five-star luxury hotel sheets. Well, something close to it.

Have I done this at home? Yes. Once. It’s a lot of work. I’d rather spend the time making pasta from scratch.

Sheet of homemade egg pasta dough being folded

How to Make Fresh Pasta Without a Machine

You may be thinking you must have a stand mixer and pasta roller to make homemade pasta. Nope. Italian grandmas make it by hand, and so can you.

Only two ingredients are necessary and you probably have them in your kitchen right now: flour and eggs. However, I highly recommend you order some Italian 00 flour because it will make your fresh pasta taste better. Other things needed: a good rolling pin, patience, and some music to listen to while you work.

The result? A fresh, light, and springy pasta. The soft and chewy texture pairs particularly well with creamy sauces, seafood, and veggies.

Folded sheet of pasta next to a ruler showing width of noodles

Lessons Learned

  • It's true. You really don’t need a pasta roller attachment to make pasta. I rolled this out with a regular rolling pin.
  • This looks like a long and kind of scary recipe. There is a lot of explanation, so don’t be frightened by the number of words. You will stop and re-read the recipe multiple times the first time you make it, but it really is simple.
  • Buy the Italian 00 flour. It is more finely ground than other types of flour and yields silky smooth noodles. I’ve tried to make pasta using American all-purpose flour and the noodles were not quite right. You won’t regret buying the 00 flour (you can also use it for pizza crust!).

Pairs With

A bread that pairs well with homemade pasta is Ligurian Focaccia.

Hat Tips

Many thanks to Samin Nosrat for her recipe and method to make the homemade egg pasta. It’s a classic that you will make again and again and again. Piazza della Rotunda photo credit goes to Gabriella Clare Marino on Unsplash.

Nest of homemade egg pasta noodles
Print
clock clock iconcutlery cutlery iconflag flag iconfolder folder iconinstagram instagram iconpinterest pinterest iconfacebook facebook iconprint print iconsquares squares iconheart heart iconheart solid heart solid icon
Close up of fresh pasta noodles

Homemade Egg Pasta (Pasta all'Uovo)

5 Stars 4 Stars 3 Stars 2 Stars 1 Star No reviews
  • Author: Betty
  • Prep Time: 45 minutes
  • Resting Time: 30 minutes
  • Cook Time: 5 minutes
  • Total Time: 1 hour 20 minutes
  • Yield: 4 servings 1x
Print Recipe

Ingredients

Scale

2 cups 00 Italian flour

2 large eggs

3 large egg yolks


Instructions

Make the dough:

  • Mound the flour on a flat surface, like a wooden cutting board. Make a well in the center of the flour and add the eggs and egg yolks. Use a fork to gently beat the eggs, incorporating some flour from the sides while keeping the liquid inside the well.
  • Once about half of the flour has been added, use your hands to gently mix the dough into a dough ball that holds together. Add a teaspoon of water if it is too stiff. Knead the dough for 4 or 5 minutes to incorporate all the flour and egg together.
  • Wrap the dough ball in plastic wrap and let it rest on the kitchen counter for 30 minutes (up to 4 hours) to completely hydrate the flour. Prepare 2 or 3 baking sheets by lining them with parchment paper and dusting them with flour.

Roll the pasta:

Divide the dough into four equal pieces. Remove one piece and re-wrap the remaining three.  Flatten the quarter piece with the heel of your hand into a rectangular shape. Roll out using one of the following methods.

Rolling Pin Method

Dust your cutting board and dough with flour. Roll out the dough with a rolling pin, keeping it to a rectangular-ish shape about 12 inches in length, until it is about 1/16th-inch thick. You will need to sprinkle with flour several times. Place on one of the prepared baking sheets and cover with a clean cloth. Repeat with the remaining dough. Dust with flour before stacking the next rolled sheet on top to prevent sticking.

Pasta Roller Attachment Method

Pass the dough through the roller, fold it in half, and roll again. Repeat a few times until the dough is smooth and even textured. Now you can start to roll it more thinly by moving the setting on the attachment. You will need to sprinkle with flour several times. Roll until the dough is about 12 inches in length and 1/16th-inch thick. Place on one of the prepared baking sheets and cover with a clean cloth. Repeat with the remaining dough. Dust with flour before stacking the next rolled sheet on top to prevent sticking.

Cut the pasta:

You should have four stacked sheets of thinly rolled dough about equal in size and thickness. Cut using one of the following methods.

By Hand

Fold the sheets (either all together or one by one) in thirds, like folding a letter to go into an envelope. Use a sharp knife to cut the dough in ½-inch increments until all the dough is cut. You can make these increments wider or skinnier, depending on how wide you like your noodles. Gently separate the noodles, fluffing with more flour if needed. Pile the noodles into small nests on the prepared baking sheets. Let dry 30 minutes before cooking. If not cooking right away, cover and store in the fridge for up to 2 days or freezer for 2 weeks.

By Cutting Attachment

Pass the pasta sheets, one at a time, through the cutting attachment on the pasta roller.  Gently separate the noodles, fluffing with more flour if needed. Pile the noodles into small nests on the prepared baking sheets. Let dry 30 minutes before cooking. If not cooking right away, cover and store in the fridge for up to 2 days or freezer for 2 weeks.

Cook the pasta:

Fill a large pot with 4 or 5 quarts of water. Add about 1 Tbsp. of salt to the water (yes, really). Remember the majority of the salty water is going down the drain in a few minutes. Bring the water to a boil and add the pasta. Cook anywhere from 2 to 6 minutes, depending on how thick your noodles are. Drain and top with whatever sauce you’d like.


Did you make this recipe?

Please leave a comment below!

Share a photo of your creation by tagging us @betty_eatz

Grilled Salmon, Corn, & Tomato Salad

June 6, 2022

Grilled Salmon, Corn, & Tomato Salad

Grilled salmon atop bed of spinach, corn, tomato salad

Fire up the barbecue! This Grilled Salmon, Corn and Tomato Salad features tender salmon, fresh veggies, and a crispy topping.

A Kodachrome Kind of Salad

Summertime is approaching and that means salad season! While plopping a cooked piece of meat on top of some greens can qualify as lunch or dinner, I like salads to be a little more interesting, delicious, and colorful. Especially colorful, like Kodachrome.

Box of Kodachrome film slides

Kodachrome 64

Long ago in a galaxy far away, people used to invite friends over for dinner and a living room slide show of their latest vacation photos. Kodachrome 64 was the popular Kodak slide film for cameras in the pre-camera phone, pre-DSLR age. This film produced sharp and saturated images that appeared in places like National Geographic magazine, the town cinema, and home slide projectors.

If you are anywhere near my age, you will recall these slides and even may have had the job of loading them into the projector wheel. Remember you had to put those slides in upside-down! I kind of geeked out reading about Kodachrome’s history and appeal.

Some may roll their eyes at the thought of sitting through a friend’s monologue describing each stop on their vacation, but the whirring projector fan, clicking slides, and vividly colored images made it extra fun to me. Scrolling through someone’s vacay photos on their Facebook page isn’t the same experience.

Although Kodak's film and slides are no longer available, their memory and allure live on. Commercially sold camera presets can almost mimic the look. Or you can enjoy some tonally rich colors by making a salad like this one.

Chopped tomatoes, red onion, parsley, and corn in a glass bowl

Eating the Rainbow

This salad is rainbow bright with yellow corn, red tomatoes, purple onion, and green parsley. Eating an array of different colored fruits and vegetables provides us with a wide variety of vitamins, minerals, and phytonutrients.

Plus, it’s pretty.

It’s easy to substitute other vegetables, hopefully equally colorful, for the ones listed in this recipe. Veggies provide not only color but also fiber and crunch to an otherwise boring salad. And a fresh counterpoint to any cooked meat or seafood.

Whole fillet of salmon with marinade poured on top

Grilled Salmon

Don’t be afraid to put a piece of fish on the barbecue. Some fish is better if baked or pan-fried, but salmon was made for the grill. It’s thick, it’s meaty, and it doesn’t fall apart.

Hot and fast, or low and slow, are both good ideas for cooking meat. In the case of salmon, hot and fast is the way to go. A 450 F to 500 F degree grill will give you perfectly cooked salmon in just under 10 minutes.

Cooked crispy salmon skin

Crispy Salmon Skin

Now this will either totally excite you or completely freak you out: crispy salmon skin. When you bake salmon skin-side down, it usually gets soggy because of the pan juices and you wind up scraping it off before eating the fish. Admittedly, just a little gross.

BUT! If you grill salmon skin-side down, that skin gets deliciously crispy and crunchy. Like pork rind and potato chip crunch level. It's uncommonly good.

Spinach on a plate, corn and tomato in a bowl, grilled salmon in a pan

Lessons Learned

  • Make sure your grill is HOT. This ensures that the salmon cooks relatively quickly and that the skin will crisp up. Don’t be afraid of the heat.
  • Flipping a whole salmon fillet on a hot barbecue was daunting to me, so I cut the fillet in half crosswise to make two equal-size squarish pieces. It worked!
  • Not everyone in your household will appreciate the crispy salmon skin. Leave it off and instead offer it on the side as an optional topping. Good news: you will probably have it all to yourself.

Hat Tips

Many thanks go to Diane Morrisey for the salad inspiration and to Foodie Crush for her detailed description of how to perfectly grill salmon. Kodak slides photo credit goes to Nathan Anderson on Unsplash.

Close up of grilled salmon on corn and tomato salad
Print
clock clock iconcutlery cutlery iconflag flag iconfolder folder iconinstagram instagram iconpinterest pinterest iconfacebook facebook iconprint print iconsquares squares iconheart heart iconheart solid heart solid icon
Grilled salmon atop bed of spinach, corn, tomato salad

Grilled Salmon, Corn, & Tomato Salad with Crispy Salmon Skin

5 Stars 4 Stars 3 Stars 2 Stars 1 Star No reviews
  • Author: Betty
  • Prep Time: 30 minutes
  • Cook Time: 10 minutes
  • Total Time: 40 minutes
  • Yield: 4 servings 1x
  • Category: Seafood, Salads
Print Recipe

Ingredients

Units Scale

Dressing:

  • ⅓ cup fresh lemon juice
  • 3 cloves garlic, minced
  • 1 tsp. dry Italian Seasoning
  • Salt and pepper to taste
  • ½ cup extra-virgin olive oil

Salad:

  • 1 large salmon fillet (about 1 ½ lb.)
  • 2 cups corn kernels (canned or boiled fresh ears)
  • 1 ½ cups cherry tomatoes, halved
  • ½ cup red onion, chopped
  • ¼ cup parsley, chopped
  • 4 cups baby spinach


Instructions

  1. Add the dressing ingredients to a half-pint size mason jar. Cover and shake to combine thoroughly.
  2. Lay the salmon on a baking sheet and pour a little less than half the dressing over the salmon and spread evenly. Save the other half of the dressing for the salad. Allow the salmon to marinate while you mix the salad and preheat the grill.
  3. Combine the corn, tomatoes, onion, and parsley in a medium bowl. Pour the remaining dressing over all and gently mix to combine. Set aside.
  4. Prep the grill according to the manufacturer’s instructions. Preheat at the highest temperature.
  5. Place the salmon fillet directly on the grill grates once the temperature has reached 450 to 500 F. Close the lid and cook for 6 to 8 minutes, undisturbed. Flip the salmon over. You should be able to cleanly lift off the salmon skin. It will be crispy on one side and still soft on the side that was touching the salmon flesh. Place the non-crispy side down on the grill grates. Close the lid and cook for 2 to 4 more minutes.
  6. Don’t overcook your fish! Pull the salmon off the grill when the temp reads 130 F then transfer it to a clean baking sheet and allow it to rest. The internal temperature will continue to rise to 145 F and it will be done. At this point, you can cut the salmon into serving-size portions.
  7. Continue cooking the salmon skin if it isn’t completely crispy yet, otherwise transfer it to a platter or baking sheet. Cut or crumble the crispy salmon skin into bite-size pieces.
  8. To assemble the salad, place the spinach on a large serving platter. Spoon the tomato corn mixture over the spinach. Nestle the salmon fillets on top of everything (make it pretty if you’d like). Top with crispy salmon skin.

Did you make this recipe?

Please leave a comment below!

Share a photo of your creation by tagging us @betty_eatz

Milk Bread

May 31, 2022

Milk Bread

Milk bread loaf in baking pan

Milk Bread, also known as shokupan, is soft, tender, and delicious. How delicious?

More Delicious than Squishmallows

Do you remember The Great Before? It seemed that no one ate bread anymore. Low-carb, no-carb, and bread is bad.

It was sad.

Then, the pandemic came along and suddenly everyone was baking and consuming mass quantities of homemade banana bread and sourdough. Imagine: everyone was making, scoring, and eating sourdough loaves!

Now, thankfully, bread is back. I never totally stopped eating bread but I certainly ate more of it during the lockdown years. And I don’t regret it. Let’s call it comfort carbs.

Because I am a longtime challah baker, I know my way around a yeasty bread bowl. I kept seeing milk bread on social media but had never made it. People were obsessed!

This Asian-style bread intrigued me. I decided to try it.

Pink unicorn squishmallow plush toy

Plush

Milk bread is sometimes called shokupan or Japanese milk bread. It is soft, fluffy, and tender. The crust is golden brown and glossy.

The interior is pillowy, plush, and deliciously cotton-like. It’s the Squishmallow of the bread world.

By the way, does everyone own a Squishmallow yet? My twenty-something daughter has several. Sometimes I “borrow” one from her room when I’m watching TV.

It is an aptly named squeezable bundle of polyester fiber and spandex joy.

The inventor of Squishmallows, Jonathan Kelly, was inspired by a trip he made to Japan. He saw the “kawaii” or “cuteness culture” and plush toys that were popular there. After he returned to California, Squishmallows were born.

You could say Squishmallows are the milk bread of the plush toy world.

Side view of milk bread loaf

Shokupan

Shokupan means “food bread” in Japanese and has a murky past. Did it arrive in Japan with Dutch and Portuguese explorers in the 1500s and 1600s, or was it invented by a British-Japanese baker in the 1800s? It’s not clear.

What do we know? It's soft. And addicting to eat.

Milk bread is made with just a few ingredients: flour, yeast, milk, salt, sugar, and butter. You can bake all kinds of bread with these basic ingredients. But the technique is what sets milk bread apart from the rest.

It starts with either yudane or tangzhong.

Whisk filled with tangzhong starter and saucepan

Yudane and Tangzhong

Yudane (a Japanese term) is a water roux made by combining equal parts boiling water and flour. Tangzhong (a Chinese term) is also a water roux but is cooked in a saucepan. The Chinese-style roux has a 1:5 flour-to-water ratio.

Both methods yield a sticky, gelatinous blob. This blob is cooled, then added to the yeast mixture. The point of the water roux? Moisture is added to the finished product.

As a result, the bread is fluffy, tender, and squishy.

I prefer the tangzhong method after having tried both ways. The cooked water roux adds a taste and texture that I happen to like. Try both and see what you think.

Risen milk bread dough being brushed with milk

Lessons Learned

  • Do not walk away from the saucepan when making the tangzhong. The flour-water mixture heats up fast and will scorch if you have the burner on too high or don’t whisk it continually. You’ve been warned.
  • Don’t freak out if the dough seems overly sticky. This is a wetter dough than many bread doughs. Add additional flour to the mixer a tablespoon at a time until the dough just starts to pull away from the bowl cleanly.
  • Make a double batch. Milk bread is very addicting to eat. You might be sad if you only make one batch. I was.

Hat Tips

This recipe, like most that I feature, is inspired by the many recipes that I find on Pinterest, Instagram, and Google searches. I combine bits and pieces of several recipes to suit my needs. Many thanks go to Chopstick Chronicles and Hungry Huy for their shokupan bread recipes!

Cross section of milk bread piece
Print
clock clock iconcutlery cutlery iconflag flag iconfolder folder iconinstagram instagram iconpinterest pinterest iconfacebook facebook iconprint print iconsquares squares iconheart heart iconheart solid heart solid icon
Milk bread loaf in baking pan

Milk Bread (Shokupan)

5 Stars 4 Stars 3 Stars 2 Stars 1 Star No reviews
  • Author: Betty
  • Prep Time: 45 minutes
  • Proof Time: 2 ½ hours
  • Cook Time: 30 minutes
  • Total Time: 3 hours 45 minutes
  • Yield: 1 loaf 1x
  • Category: Bread
Print Recipe

Ingredients

Units Scale

Tangzhong:

  • ⅓ cup water
  • 2 Tbsp. + 1 tsp. all-purpose flour

Yeast Dough:

  • ½ cup milk (cow or almond)
  • 1 ½ tsp. active dry yeast
  • 2 ⅔ cups all-purpose flour
  • 1 tsp. sea salt
  • 3 Tbsp. granulated white sugar
  • 1 large egg
  • ¼ cup butter, melted

Egg Wash:

  • 1 large egg
  • 1 Tbsp. milk or water


Instructions

  1. Make the tangzhong. Pour water into a medium saucepan. Place the pan over medium-high heat and add the flour. Whisk until combined. Continue to whisk as the mixture heats up. Remove the pan from the heat once a roux, or loose paste, is formed and the whisk leaves a clear trail on the bottom of the pan. Set aside and let cool.
  2. Make the yeast dough. Heat the milk in a small bowl in the microwave for 30 seconds or until body temperature (around 98 F/36 C). Add the yeast and stir until dissolved. Let it sit for a few minutes until foamy. Tip the yeast mixture, flour, salt, sugar, egg, and butter into the bowl of a stand mixer and stir with a large spoon to combine. Mix the dough for 8 to 10 minutes until it comes together and pulls away from the sides of the bowl using the dough hook attachment. You may need to add a sprinkle of flour if it is too tacky. 
  3. Proof the dough. Gather it up out of the mixer, shape it into a loose ball, and place it inside a large bowl that has been sprayed or lightly greased with oil. Cover with lightly greased plastic wrap and place in a warm spot. At this point, you can refrigerate the dough overnight and bake it the next day. Let rise for 1 hour or until doubled in size if you are baking it the same day.
  4. Shape the dough. Punch down the dough and hand knead it for a minute or two. 
    • Loaf bread: Grease a 9x5 loaf pan and set aside. Divide the dough equally into 3 pieces. Knead each piece a few times. Taking one piece, pat or roll it out into a large oval shape. Fold up the bottom third towards the middle and fold down the upper third towards the middle, like you would fold a letter to go inside an envelope. Turn the dough so the short end is facing you and roll it up into a short, fat log. Place seam side down in the prepared pan. Repeat with the other two pieces. 
    • Buns: Grease an 8x8 square pan or 7x11 small rectangle pan. Divide the dough equally into 6 pieces for large buns or 9 pieces for smaller ones. Knead each piece a few times. Roll one piece into a ball and place it in the prepared pan. Repeat with the other pieces. 
  5. Proof the dough for a second rise. Cover it with lightly greased plastic wrap and place it in a warm spot. Let rise for 1 to 1 ½ hours or until the dough has risen over the top of the pan. If your dough was kept overnight in the fridge, it will take longer to rise, closer to 2 to 2 ½ hours. 
  6. Preheat the oven to 350 F/176 C and move the oven rack to the center position. Remove the plastic wrap from the dough. Mix the egg and liquid to prepare the egg wash. Gently brush the dough with egg wash. Place the pan in the oven and bake for around 30 minutes, give or take 5 minutes. Bread is done when the tops are golden brown. Remove the bread from the oven and let it cool for 5 minutes in the pan. After 5 minutes, immediately remove the bread from the pan and place it on a wire rack to finish cooling. Time yourself and see how long you can resist eating these while they are warm. 

Did you make this recipe?

Please leave a comment below!

Share a photo of your creation by tagging us @betty_eatz

Fruit Dome Cake

May 22, 2022

Fruit Dome Cake

overhead view of fruit dome cake on a black plate

Layers of sponge cake, whipped cream, and fruit make up this light and tasty Fruit Dome Cake.

The Igloo You Eat

Have you ever pinned something to a board on Pinterest and forgotten about it? That’s what happened with this cake. I pinned it because it looks so cool, kind of like a fruity igloo.

Then I forgot about it.

But! A friend went to Alaska to view the northern lights and stayed in a glass-domed igloo at a base camp outside Fairbanks. The northern lights, sometimes called aurora borealis, are an atmospheric display of colorful dramatic light waves seen in the night sky.

northern lights over snowcapped mountain and a town at night

Seeing the Northern Lights

How does this atmospheric phenomenon occur? Grade school explanation: solar wind particles + earth’s upper atmosphere = aurora borealis. The lights are best seen in winter and usually within a 1,500-mile radius around the North Pole.

Is this on your Pinterest bucket list board? Finland’s Kakslauttanen Arctic Resort is where you can lodge in a glass igloo and watch the northern lights while lying in bed. I certainly have it on mine.

Somehow, my friend’s northern lights trip made me remember the fruit-filled dome cake I had pinned.

Inside of fruit dome cake with whipped cream being spread on sponge cake layers
Inside of fruit dome cake with strawberries and blueberries arranged on whipped cream and cake layers

Fruit Dome Cake is an OCD Riff on Trifle

Trifle is a layered dessert that usually includes cake pieces, custard, jam, fruit, and whipped cream. The fruit dome cake is really a pared-down version of a trifle with artfully arranged fruit. It is built upside down in a glass bowl that will eventually be flipped after being assembled.

The cake’s pretty pattern of fruit and the snowy white of the whipped cream will almost make you forget about wanting to stay at Kakslauttanen Arctic Resort. Almost.

blueberries, sliced strawberries, and sliced kiwi

sponge cakes in baking pans cooling on wire racks

Lessons Learned

  • Beat the genoise sponge batter long enough for it to nearly triple in volume. The prolonged beating incorporates air into the batter and allows the cake to rise properly. Otherwise, you will have a sad, slunky mess of a cake once it is baked.
  • The baked sponge cake has been described as hygroscopic. I didn’t make up this word. It means that this cake will absorb moisture from the air or anywhere else it can get it. Make that moisture flavorful, meaning booze. I chose triple sec.
  • You can use any kind of fruit. But not bananas. They will turn brown, even if you toss them in lemon juice, and make your finished creation slightly unlovely. But you’re an adult, so do what you want.

Hat Tips

Many thanks go to Tastemade for their beautiful fruit dome cake idea and Natasha’s Kitchen for the no-fail sponge cake recipe (which I have made many, many times!). Northern lights photo credit goes to Johny Goerend on Unsplash.

cross section slice of fruit dome cake showing layers of cake, fruit, and whipped cream
Print
clock clock iconcutlery cutlery iconflag flag iconfolder folder iconinstagram instagram iconpinterest pinterest iconfacebook facebook iconprint print iconsquares squares iconheart heart iconheart solid heart solid icon
overhead view of fruit dome cake on a black plate

Fruit Dome Cake

5 Stars 4 Stars 3 Stars 2 Stars 1 Star No reviews
  • Author: Betty
  • Prep Time: 35 minutes
  • Chill Time: At least 1 hour
  • Cook Time: 25 minutes
  • Total Time: 2 hours
  • Yield: 12 servings 1x
  • Category: Sweets
Print Recipe

Ingredients

Scale

Genoise sponge:

6 eggs, room temperature

1 cup granulated sugar

1 cup all-purpose flour

½ tsp. baking powder

Garnishes:

1 cup heavy whipping cream

½ cup plain Greek yogurt

1 Tbsp. granulated sugar

1 kiwi, peeled and sliced

2 cups sliced strawberries

1 cup blueberries

2 Tbsps. triple sec or Cointreau


Instructions

Make the genoise sponge:

  • Preheat the oven to 350˚F/176 C. Line two 9-inch cake pans with parchment paper. Be sure you do not use any grease on the bottom or sides. This cake needs an ungreased surface to properly rise.
  • Beat 6 eggs in a stand mixer with the whisk attachment on high speed for one minute (or with a hand mixer for 2 to 4 minutes). Slowly add sugar while the mixer is still running. Beat for another 8 to 10 minutes until thick, fluffy, and nearly triple in volume. Important note: The batter should be thick enough to stream off the whisk in ribbons that hold their shape on the surface of the batter for 5 or more seconds.
  • Sift the flour and baking powder together and add to the batter in thirds. Using a spatula, fold in the flour after each addition. Be sure you haven’t missed any pockets of dry flour. Don’t overmix the batter, however, or it will deflate.
  • Pour the batter into the prepared pans, dividing evenly. Bake at 350F/176C for 25 minutes or until golden brown. Remove from the oven and run a knife around the edges to loosen the sides. Turn the cakes out onto wire racks to cool. Carefully peel off the parchment paper and allow it to cool completely.

Assemble the dome cake:

  • Beat the cream, yogurt, and sugar together until light and fluffy, about 5 minutes. Set aside.
  • Line the inside of a bowl (8 or 9-inches across and about 4 inches deep) with plastic wrap, allowing for a 2-inch overhang. You will need two or three sheets of plastic wrap. Decoratively (or randomly) place the fruit in a single layer, starting at the bottom and working your way up nearly to the top edge.
  • Divide the whipped cream mixture into thirds. Place one-third of the whipped cream mixture on top of the fruit and gently spread it until it covers the fruit.
  • Cut one sponge cake into six or eight pie-shaped pieces. Leave the other cake whole. Place as many cut pieces as will fit in a single layer on top of the cream. Using a pastry brush, sweep the cake pieces with some triple sec until the cake is just moist. Top with one-third of whipped cream and spread it to the edges.
  • Arrange any remaining fruit on top of the whipped cream. Add the last third of the whipped cream and spread it on top of the fruit. Finally, place the second uncut cake layer on top of the cream and gently press it down to fit. You may need to trim the edges, depending on the size of your bowl. Cover with plastic wrap and refrigerate for at least 1 hour to set.
  • To serve, remove the cover and place a plate or serving platter on top of the bowl. Holding the plate and bowl together, flip the whole thing upside down so that the cake is now right side up on the plate. Remove the bowl and carefully peel back the plastic wrap layer to reveal your beautiful cake! Slice with a serrated knife and serve.

Did you make this recipe?

Please leave a comment below!

Share a photo of your creation by tagging us @betty_eatz

Cape Gooseberry Pavlova

May 17, 2022

Cape Gooseberry Pavlova

Whole Cape gooseberry with calyx pulled back

Crunchy meringue, creamy whipped cream, and sweet-tart gooseberries make for a spectacular dessert: Cape Gooseberry Pavlova!

The Dangerously Good Superfood

Superfoods? Yawn. I already know about them.

What about one that might kill you?

Wait. What? Why the heck would I eat that?

Um, because it’s delicious. Oh, and it combats cancer, slashes bad cholesterol, and knocks down inflammation.

But, is it actually yummy?

They are Scary Delicious

The fruit display brought me to a full stop. I had only seen Cape gooseberry in my copy of an Ottolenghi cookbook. When I spotted the fruit at my local grocery store last week, I stood in front of the display open-mouthed. Wow.

The taste? Imagine if candy Sweetarts were a fruit. That’s what these taste like. Slightly sweet, slightly tangy, yet hard to describe. They are unlike anything else I’ve tasted. Why yes, I bought a small box of them from that grocery store display.

Cape gooseberry is a beautiful, yellow-orange fruit about the size of a marble. It goes by many names: aguaymanto, Aztec berry, goldenberry, harankash, husk cherry, Inca berry, Peruvian groundcherry, pichuberry, poha berry, topotopo, and uchuva. Seriously, SO MANY NAMES. For my gardening geek friends: the binomial nomenclature, or Latin name, is Physalis peruviana (yo, thanks Carl Linnaeus!).

Originally native to Peru, Colombia, and Ecuador, Cape gooseberry is now grown all over the world in tropical and subtropical climates like Hawaii, where it is called poha berry. The fruit is enclosed in a papery husk, like that of tomatillos. Once the fruit is ripe, that papery husk, or calyx, can be opened to show off the yellowy orange orbs.

By the way, they might kill you.

Leopard seal

Leopard Seals of the Fruit World

Cape gooseberries are the leopard seals of the fruit world. Leopard seals are so dang cute! But wow, don’t tick them off, especially if they are eating. They can be dangerous.

Because Cape gooseberries (also so dang cute!) belong to the nightshade family, they contain a toxin called solanine. It is present in green, unripe berries. When consumed, solanine causes cramping, diarrhea, vomiting, slowed pulse, and labored breathing which can be fatal.

Not a pretty way to die.

Easy solution: only eat them once they turn orange. This shouldn’t be a problem because grocers only carry the ripened fruit. Whew!

Cape gooseberry cut in half surrounded by whole gooseberries in calyx

Cape Gooseberries have Superfood Status

How superfood-y are these yellow orange berries? In a word, very. According to registered dieticians, they contain several vitamins, nutrients, antioxidants, and withanolides (I didn’t make up this word, although it sounds like it).

Cape gooseberries contain:

  • Vitamin A: important for immunity, vision, reproduction
  • Vitamins B1, B2, B3: needed for brain health, energy production, breaking down of fats and drugs in the body
  • Vitamin C: bolsters immune system and wound healing
  • Vitamin E: antioxidant that supports blood vessels, immune system, brain
  • Vitamin K: regulates blood clotting to prevent excessive bleeding
  • Iron: helps the body produce blood, mostly in the form of hemoglobin. The red blood cells help oxygen to be carried to all parts of the body
  • Phosphorus: assists the bones and teeth in staying strong, but also helps filter waste from the kidneys
  • Antioxidants: protect against destructive free radicals and certain types of cancer.
  • Phytosterols: help reduce the bad type of cholesterol, LDL
  • Withanolides: anti-inflammatory steroids that assist in lessening inflammation
Cape gooseberry with caramel toffee coating

How to Eat Cape Gooseberries

How are they eaten? In salads, salsas, sauces, and other savory dishes. They are also used for sweets like jams, cakes, ice creams, and tarts. Cape gooseberries can go into just about any category of food. They’re category fluid.

I’ve been eyeing a recipe in Yotam Ottolenghi and Helen Goh’s cookbook, Sweet, ever since I bought the book a few years ago. Their Cape Gooseberry Pavlova consists of crisp meringue, yogurt cream, and toffeed Cape gooseberries. Gorgeous! My version of their recipe takes a few shortcuts but is definitely inspired by the original.

Baked meringues on baking sheet

Lessons Learned

  • Do not walk away from the sugar as it melts in the saucepan. It melts and scorches fast, leaving you with a kitchen that smells like a tire fire. Monitor the sugar at all times!
  • Do not open the oven door when the baking time is done. Your meringues, and heart, will break. Leave them undisturbed to cool in the oven for several hours.
  • Read the instructions twice. I misread the circle tracing instructions and made 8 giant pavlovas instead of 16 little ones. So, not to brag, but my pavlovas were huge. It made them harder to eat once they were assembled.

Hat Tips

Many thanks go to Ottolenghi and Helen Goh for their recipe! Leopard seal photo credit to goes to Bob Brewer on Unsplash.

Stacked meringues with whipped cream and Cape gooseberry halves
Print
clock clock iconcutlery cutlery iconflag flag iconfolder folder iconinstagram instagram iconpinterest pinterest iconfacebook facebook iconprint print iconsquares squares iconheart heart iconheart solid heart solid icon
Stacked meringues with whipped cream and Cape gooseberry halves

Cape Gooseberry Pavlova

5 Stars 4 Stars 3 Stars 2 Stars 1 Star No reviews
  • Author: Betty
  • Prep Time: 45 minutes
  • Cook Time: 2 hours
  • Total Time: 2 hours 45 minutes
  • Yield: 8 1x
  • Category: Sweets
Print Recipe

Ingredients

Units Scale

Meringues:

  • 4 ½ oz. egg whites (from 3 large eggs)
  • ⅛ tsp. salt
  • ¼ tsp. cream of tartar
  • 1 ¼ cup granulated sugar

Toffee:

  • ¼ cup granulated sugar

Garnishes:

  • 14 oz Cape gooseberries, divided use
  • 1 cup whipping cream, whipped into soft peaks


Instructions

To make the meringues:

  1. Preheat the oven to 275°F/140°C. Place oven racks on the two middle shelves of the oven. Trace 8 circles, about 3 inches/8 cm wide, on a sheet of parchment paper. Repeat on a second sheet of parchment paper. Place parchment papers on two baking sheets.
  2. Whisk the egg whites and salt together with a mixer, either stand or hand-held, until frothy. Add the cream of tartar and beat until soft peaks are formed. Spoon in the sugar, one tablespoon at a time, until all the sugar is added. The mixture should be thick and shiny.
  3. Dollop a large spoonful of the mixture onto each of the drawn circles on the parchment paper, dividing equally. Smooth the tops with the back of a spoon. Each meringue should be ⅓ inch/1 cm thick. 
  4. Place both baking sheets in the oven. Bake for 2 hours. Turn off the oven but do not open the door! Opening the oven door will let in cooler air and cause the meringues to crack and collapse. Let the meringues cool, undisturbed, for at least 2 to 3 hours.  

To make the toffee:

  1. Select 8 Cape gooseberries and carefully peel back the papery husk but leave it attached to the berry. Set aside.
  2. Place the sugar in a small saucepan and cook over medium heat. Do not stir. Tilt the pan from side to side as the sugar melts and caramelizes. 
  3. Once the sugar is a caramel color, remove it from the heat. 
  4. Working quickly, tilt the pan so that the toffee collects to one side. Holding onto the husk, dip gooseberry (just the fruit, not the husk) into the toffee. Let the excess toffee drip back into the pan and place the fruit on a plate or sheet of parchment. 
  5. Repeat with the remaining 7 gooseberries. 

To assemble:

  1. Remove the papery husk from the remaining gooseberries and cut them in halves.
  2. Top one meringue with whipped cream and a few berry halves. Place another meringue on top. Spoon on more whipped cream and top with a toffee-coated Cape gooseberry as a garnish. 

Did you make this recipe?

Please leave a comment below!

Share a photo of your creation by tagging us @betty_eatz

Preserved Lemons

May 11, 2022

Preserved Lemons

Twelve whole lemons on a cutting board

A must-have condiment in my pantry: Preserved Lemons.

Why You Need Preserved Lemons in Your Fridge

Do you have a lemon tree? Or have you been gifted with a plastic grocery sack full of lemons by a well-meaning friend? You may be wondering what in the world to do with all that sunshiny fruit.

I have a Meyer lemon tree. At certain times of the year, my kitchen counter looks like a citrus stand at the local farmer's market. I am always looking for a way to make the most of the backyard bounty (in addition to giving it away in plastic grocery sacks to friends).

Lemon scored in quarters and packed with salt

The Solution: Pack Them in Salt

The goal with any fruit or vegetable surplus is to use it all before it rots. Yes, I could always make lemonade or something sweet. But there is a limit to how many lemon bars one can eat, theoretically.

Taking a page from the old world practice of preserving food with salt, lemons are cured in their juices with lots of salt. They are basically lemon pickles. Now if that sounds terrible to you, read on.

How to Use Preserved Lemons

You wouldn’t think that something sour and salty is what you want to put on your food, let alone spend an afternoon making. But think about all the sour and salty condiments you already use: capers, anchovies, and miso paste. No? How about soy sauce, kimchi, and pickles?

Preserved lemons offer a bright, slightly tangy, umami hit to whatever you serve them with, like chicken, fish, lamb, root vegetables, pasta, and grains. I also like them whizzed into vinaigrettes, sauces, and dips.

Did all those suggestions confuse or overwhelm you? Here, my darling, are some specific recipes that utilize preserved lemons:

  • Roast Chicken with Preserved Lemons
  • Yas Queen Pizza with zucchini, feta, and preserved lemon
  • Bucatini with Preserved Lemon, Swiss Chard, and Cream
  • Ultimate Winter Couscous
  • Shrimp and Arugula Salad with Preserved Lemon Dressing

They Provide Vegan Umami

When we talk about umami, we are referring to a meaty savoriness that certain foods and condiments possess. Things like aged cheeses, fish sauce, meats, and seafood are rich in umami flavor.

But what if you are vegan? You can enjoy umami savoriness in mushrooms, ripe tomatoes, seaweed, and certain veggies. And yes, preserved lemons!

Any salted, fermented, cured item will lend umami flavor to whatever you are cooking and eating.

Mason jar filled with lemons packed with salt

How to Make Preserved Lemons

Now that you have decided that you need preserved lemons in your life, let’s make them. You only need two ingredients: lemons and kosher salt. Plus a mason jar.

Well, you will also need patience. These take a minimum of three weeks to cure before they are ready to be used. So, hang on to all those recipes you just bookmarked and make them three weeks from now.

Because I was going to use preserved lemons in a variety of dishes both savory and sweet, I chose not to include any optional ingredients like peppers, bay leaves, or spices, but include them if you want.

Preserved lemons in a mason jar

Lessons Learned

  • Choose your lemons carefully. Some of the lemons from my tree are the size of grapefruit and getting them into a quart-size canning jar was like me trying to squeeze into my favorite pair of skinny jeans after Christmas cookie season. Pick the ones that will fit.
  • Discard any visible seeds as you are cutting the lemons. You won’t get them all, but that’s okay. There will be fewer seeds to fish out later.
  • This will keep in the fridge for up to a year. If the canning jar is taking up too much real estate in your refrigerator, puree the contents into Preserved Lemon Paste and store in the fridge in smaller jars. The paste is easy to use and provides the same flavor.

Hat Tips

Inspiration for preserving lemons came from many great recipes, all with clear directions. Thanks go to Simply Recipes and Yotam Ottolenghi for sharing theirs.

Print
clock clock iconcutlery cutlery iconflag flag iconfolder folder iconinstagram instagram iconpinterest pinterest iconfacebook facebook iconprint print iconsquares squares iconheart heart iconheart solid heart solid icon
Preserved lemons in a mason jar

Preserved Lemons

5 Stars 4 Stars 3 Stars 2 Stars 1 Star No reviews
  • Author: Betty
  • Prep Time: 1 hour
  • Curing Time: 3 weeks
  • Total Time: 1 hour plus 3 weeks
  • Yield: 1 quart jar 1x
  • Category: Condiments and Sauces
Print Recipe

Ingredients

Scale

6 to 10 unwaxed lemons

½ cup to 1 cup kosher salt

Fresh lemon juice


Instructions

  1. Clean and sterilize a quart-size canning jar. An easy way to do this: fill a clean jar with boiling water, allow it to sit for a few minutes, and pour the water out. Allow it to air dry while you prepare the lemons.
  2. Scrub and rinse the lemons so they are free from any dirt. Cut a tiny bit (⅛ to ¼ inch) off the end of the lemons to remove any stems. 
  3. Cut lemons in half lengthwise but not all the way through. Keep a base at the bottom so that the halves are still attached. Cut again lengthwise to make quarter slices, still attached at the bottom. 
  4. Stuff the cut lemons with 1 tablespoon of kosher salt.
  5. Tip 2 Tablespoons of salt into the canning jar. Place the prepared lemons into the canning jar, pressing them down to fit as many as you can. Their juices will come out and start to fill the jar. Add 2 more Tablespoons of kosher salt.
  6. Juice any remaining lemons and pour the juices into the jar to fill it to the top.
  7. Secure the lid and outer ring to the top of the jar and screw on to close it tightly. Turn the jar upside down a few times to distribute the juices and salt. 
  8. Allow the jar to sit on your kitchen counter for 2 or 3 days. Then, move the jar to the refrigerator and let the lemons cure for at least 3 weeks before using. Preserved lemons can be stored in the fridge for 6 months to 1 year. 

Did you make this recipe?

Please leave a comment below!

Share a photo of your creation by tagging us @betty_eatz

Ligurian Focaccia

May 11, 2022

Ligurian Focaccia

focaccia bread slices

The dimples and crevices of Ligurian focaccia trap olive oil and salt, giving the bread a crunchy and delicious taste and texture.

The ASMR of Ligurian Focaccia

One could fall asleep watching focaccia being prepped for the oven. It is mesmerizing to watch hands and fingers massaging the bubbly dough into peaks and valleys. I relaxed, but now I am also hungry for bread.

What is Focaccia?

Focaccia is the irresistible yeasted flatbread of Italy that is fancy enough to be served in fine dining restaurants yet humble enough to be made at home. The characteristic dimples that are scattered all over the top trap olive oil and salt, adding to the deliciousness.

Can you really make it at home? Yes. But most folks (including myself until recently) wind up with a mediocre focaccia.

Whoa, whoa, whoa. That’s a little brutal. Well, if we are going to take the time, effort, and expense of making bread at home, let’s make sure it is spectacularly good.

And an extra benefit? The visual ASMR.

Bob Ross picture on can of energy drink

Visual ASMR

ASMR, or autonomous sensory meridian response, is a pleasing and relaxing reaction to certain stimuli. I associate it with sounds like ocean waves, rain, and background noise at a favorite coffee shop.

I learned recently that there are six types of ASMR and one is visual. This explains why our brains get tingly while watching things like Bob Ross painting happy little trees on The Joy of Painting. It chills us out.

That satisfying cooking video of hands and fingers dimpling the focaccia dough? It’s visual ASMR and I am here for it.

Fingers of a left hand making dimples in focaccia dough

How to Make Focaccia

My daughter and I recently watched Salt, Fat, Acid, Heat on Netflix and were immediately obsessed. We decided that Samin Nosrat is cool and funny, someone that we would want as a friend. Additionally, the food she was preparing and eating in those episodes—just wow.

The Fat episode featured the foods of Italy and a local baker helped Samin prepare Ligurian focaccia. Normally, focaccia dough is proofed, dimpled, then baked. It is pizza crust’s thicker cousin.

We gasped as the baker poured a small cup of salt water over the dough after dimpling it. What the what. This not-so-common add of briny water before baking gives the finished bread a hit of salt and crispiness that most focaccias lack. 

This. This is how to make stellar focaccia!

What happened to Crystelle’s focaccia?

On a side note, what exactly happened to Crystelle Pereira’s focaccia on the 2021 season finale of the Great British Baking Show? It was raw enough that Paul and Prue deemed it inedible. No one, including Crystelle, really knows.

The audio ASMR sound on that: hearts breaking everywhere. She almost won.

Lessons Learned

  • Planning ahead is important to this recipe’s success. I know, our tummy wants it right now. But the dough benefits from an overnight rest.
  • This dough has a lot of spring and will try your patience by resisting as you attempt to stretch it to the edges of the pan. Like parenting a twenty-something year old, be patient and give it time to relax. 
  • I was afraid that pouring the entire one-third cup of salty water on the dough was going to be a disaster. It wasn’t. Do it.

Hat Tips

Many thanks go to Samin Nosrat and Salt Fat Acid Heat for leading me down the briny path to the most delicious focaccia in the world.

Print
clock clock iconcutlery cutlery iconflag flag iconfolder folder iconinstagram instagram iconpinterest pinterest iconfacebook facebook iconprint print iconsquares squares iconheart heart iconheart solid heart solid icon
focaccia bread slices

Ligurian Focaccia

5 Stars 4 Stars 3 Stars 2 Stars 1 Star No reviews
  • Author: Betty
  • Prep Time: 15 minutes
  • Proof Time: Overnight plus 1 hour 15 minutes
  • Cook Time: 30 minutes
  • Total Time: 2 hours plus overnight
  • Yield: 16 servings 1x
  • Category: Bread
Print Recipe

Ingredients

Scale

Dough:

2 ½ cups lukewarm water

½ tsp active dry yeast

2 ½ tsp honey

5 ⅓ cups all-purpose flour

2 Tbsp kosher salt or 1 Tbsp fine sea salt

¼ cup extra-virgin olive oil, plus more for pan and finishing

Flaky salt for finishing

Brine:

1 ½ tsp Diamond Crystal Kosher Salt

⅓ cup lukewarm water


Instructions

  1. Combine the water, yeast, and honey in a medium bowl. Stir to combine to hydrate the yeast. 
  2. In a large bowl, combine the flour and salt. Pour in the yeast mixture and the oil. Stir to combine ingredients together.
  3. Cover with plastic wrap and let sit on the kitchen counter overnight, at least 12 hours and up to 24 hours. The dough will ferment and double in volume.
  4. The next day, prepare an 18 x 13 rimmed baking sheet by spreading 2 Tablespoons of oil evenly. 
  5. As tempting as it is to punch down the dough, don’t do it. Release the dough from the sides of the bowl and gently fold it in half. Place it on the prepared pan.
  6. Spread another 2 Tablespoons of oil over the surface of the dough and gently stretch the dough out to fill the pan. It will shrink back, but continue to gently stretch it by placing hands underneath and pulling outwards. Let it rest for a few minutes, then stretch it again until it reaches, or nearly reaches, the edges of the pan.
  7. Now comes the visual ASMR part: using the first three fingers of each hand, dimple the dough by pressing the finger pads into the dough and sliding them away from you a couple of inches. Continue this along the length and width of the dough. 
  8. In a cup, combine the salt and water to make the brine. Stir until the salt is completely dissolved. Pour the salted water over the dough evenly, filling the dimples. Don’t be afraid. Allow dough to proof for 45 minutes.
  9. Adjust your oven rack and place it in the center position. Place another 18 x 13 baking sheet upside down on the rack as you preheat the oven to 450 degrees F/235 degrees C.
  10. Sprinkle dough with flaky salt and place the pan directly on top of the preheated baking sheet. Bake for 25 to 30 minutes, or until the bottom crust is golden brown. If the top crust needs browning, move the pan to an upper rack and bake 5 minutes more.
  11. Remove from the oven and immediately brush 2 Tablespoons of oil all over the surface. Cool in the pan for 5 minutes, then transfer focaccia out of the pan and onto a wire cooling rack. 
  12. Slice with a serrated knife. Serve warm or at room temperature. You may find it difficult not to eat the whole thing in one sitting.  

Did you make this recipe?

Please leave a comment below!

Share a photo of your creation by tagging us @betty_eatz

  • « Go to Previous Page
  • Page 1
  • Page 2
  • Page 3
  • Page 4

Primary Sidebar

It's me!

Hi, I'm Betty! Welcome to Betty Eatz!

On this site you will find recipes that are simple, fresh, and a little out of the ordinary. Take a look around, cook from a few, and say hi in the comments.

More about me →

Popular

  • Pork chops with figs and thyme.
    Pork Chops with Figs and Thyme

  • Vanilla latte pie.
    Vanilla Latte Pie

  • Cherry whiskey sour.
    Cherry Whiskey Sour

  • Slices of Mushroom Loaf.
    Mushroom Loaf

Recent Posts

  • Pork Chops with Figs and Thyme
  • Vanilla Latte Pie
  • Cherry Whiskey Sour
  • Mushroom Loaf
  • Nutty Noodles with Shrimp

Recent Comments

  1. Betty on Vegan Triple Coconut Cake
  2. Annaliza on Vegan Triple Coconut Cake
  3. Betty on Pasta with Preserved Lemon Alfredo
  4. susan on Pasta with Preserved Lemon Alfredo
  5. Betty on Salmon Wellington

Archives

  • November 2024
  • October 2024
  • September 2024
  • August 2024
  • July 2024
  • June 2024
  • May 2024
  • March 2024
  • February 2024
  • January 2024
  • December 2023
  • November 2023
  • October 2023
  • September 2023
  • July 2023
  • June 2023
  • May 2023
  • April 2023
  • March 2023
  • February 2023
  • January 2023
  • December 2022
  • November 2022
  • October 2022
  • September 2022
  • August 2022
  • July 2022
  • June 2022
  • May 2022

Categories

  • Bread
  • Breakfast
  • Cocktails
  • Dressings, Jams, Sauces
  • Meat
  • Pasta, Rice, and Grains
  • Pizza and Flatbread
  • Salads
  • Snacks
  • Soups and Stews
  • Sweets
  • Vegetables

Footer

↑ back to top

About

  • Privacy Policy
  • Disclaimer
  • Terms of Use

Contact

  • Contact

Copyright © 2025 Betty Eatz